Using diy spray foam insulation is becoming a popular option for homeowners looking to improve energy efficiency and seal air leaks without hiring a contractor. Spray foam insulation expands to fill gaps, cracks, and hard-to-reach areas, making it an effective solution for reducing heat loss and improving indoor comfort. However, while DIY kits can be convenient, they also come with challenges that homeowners should understand before starting a project.
- Energy savings: Helps reduce heating and cooling costs.
- Air sealing: Expands to fill gaps and prevent drafts.
- DIY potential: Available in kits for small to medium projects.
What Is DIY Spray Foam Insulation?
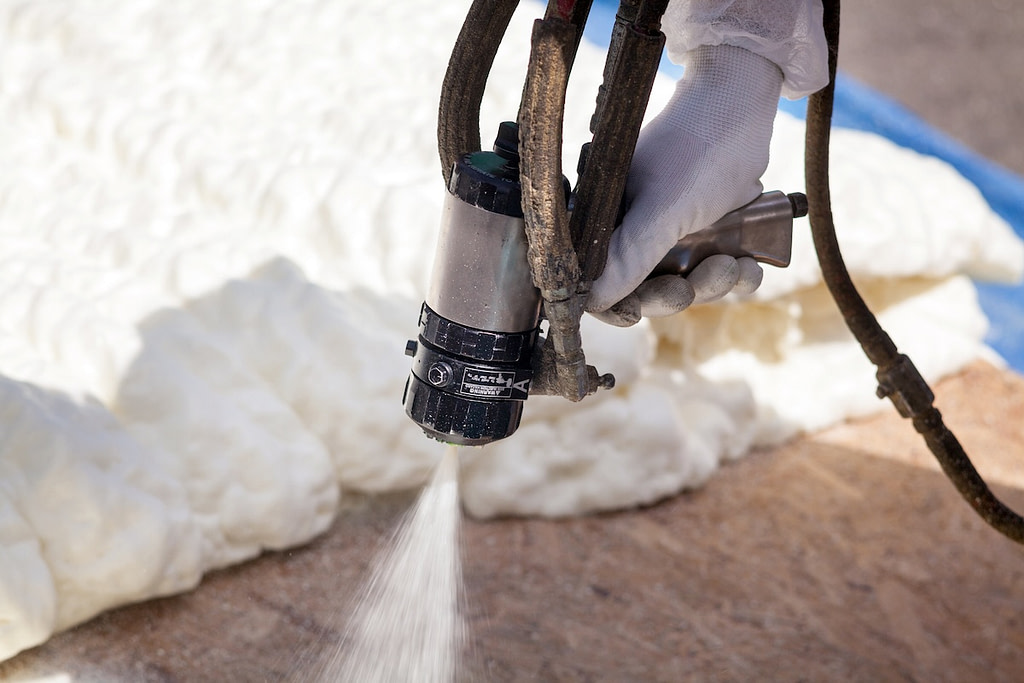
DIY spray foam insulation is a two-component foam product that expands when applied, creating an airtight seal. It is commonly used in areas like attics, crawl spaces, rim joists, wall cavities, and around windows or a door. Unlike traditional insulation, spray foam not only insulates but also blocks air movement, which improves overall energy efficiency.
A spray foam insulation kit is designed for homeowners to apply the foam themselves, and these all-in-one kits often include the gun and safety gear. While convenient, proper handling and application are essential to achieve the best results and avoid issues, and following the process carefully helps achieve better results.
6 Key Pros and Cons of DIY Spray Foam Insulation
Understanding the advantages and limitations of diy spray foam insulation helps homeowners decide if it is the right option for their project.
1. Excellent Air Sealing Performance
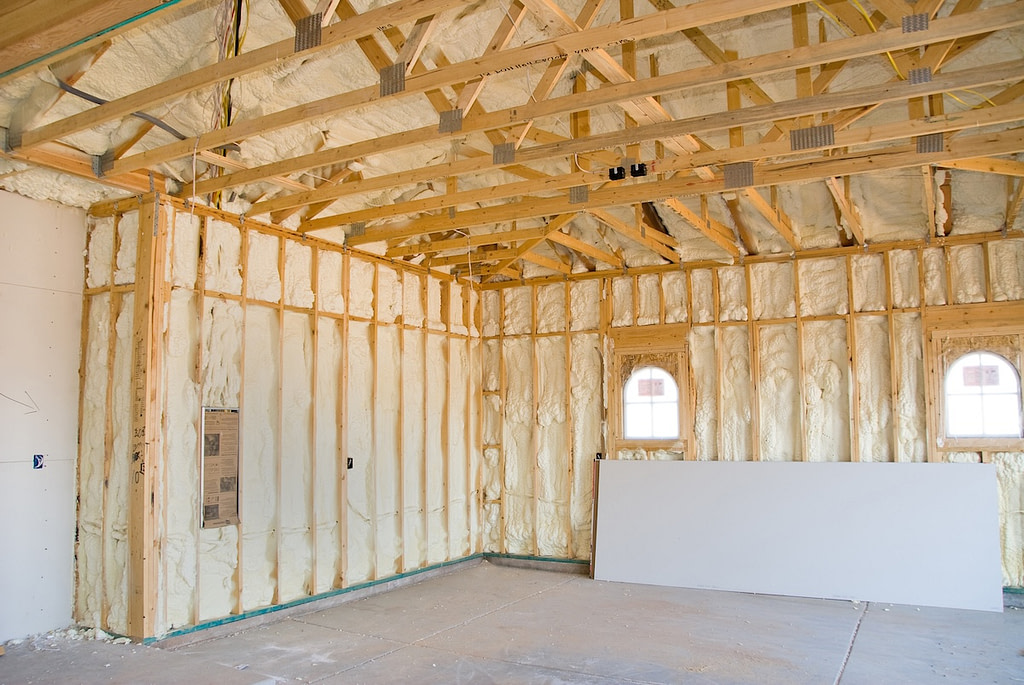
- Expanding coverage: Foam can cover irregular surfaces, fill wall cavities more completely, and seal cracks, gaps, and other hard-to-reach spaces.
- Draft reduction: Prevents air leaks that affect comfort in walls and other problem areas.
- Energy efficiency: Helps maintain consistent indoor temperatures.
Spray foam is one of the most effective insulation types for sealing air leaks.
2. Improved Energy Efficiency
- Lower utility bills: Reduces heating and cooling costs over time.
- Better temperature control: Keeps indoor spaces more comfortable.
- Reduced HVAC strain: Heating and cooling systems work more efficiently.
Energy savings are one of the biggest benefits of spray foam insulation.
3. Moisture Resistance Benefits
- Water resistance: Helps prevent moisture from entering certain areas.
- Mold prevention: Reduces the risk of mold growth.
- Improved durability: Protects structural components from moisture damage.
Closed-cell spray foam offers stronger moisture protection than open-cell options, and some products are fire-rated, which can matter in utility areas where added fire resistance is important.
4. Higher Upfront Cost for DIY Kits
- Material expense: Spray foam kits can be costly compared to other insulation types.
- Limited coverage: Larger areas may require multiple kits.
- Budget consideration: Costs can add up quickly for bigger projects.
DIY spray foam insulation is often more expensive than traditional insulation materials. Even if a small kit seems like a reasonable purchase, total costs can rise fast on bigger jobs. DIY can be cost effective for small projects, but larger areas may need multiple kits and can end up costing more than hiring a professional company.
5. Application Challenges
- Learning curve: Proper application requires practice and precision.
- Even coverage: Inconsistent spraying can lead to gaps or waste.
- Temperature sensitivity: Foam performance depends on proper conditions.
Incorrect application can reduce effectiveness and lead to uneven insulation.
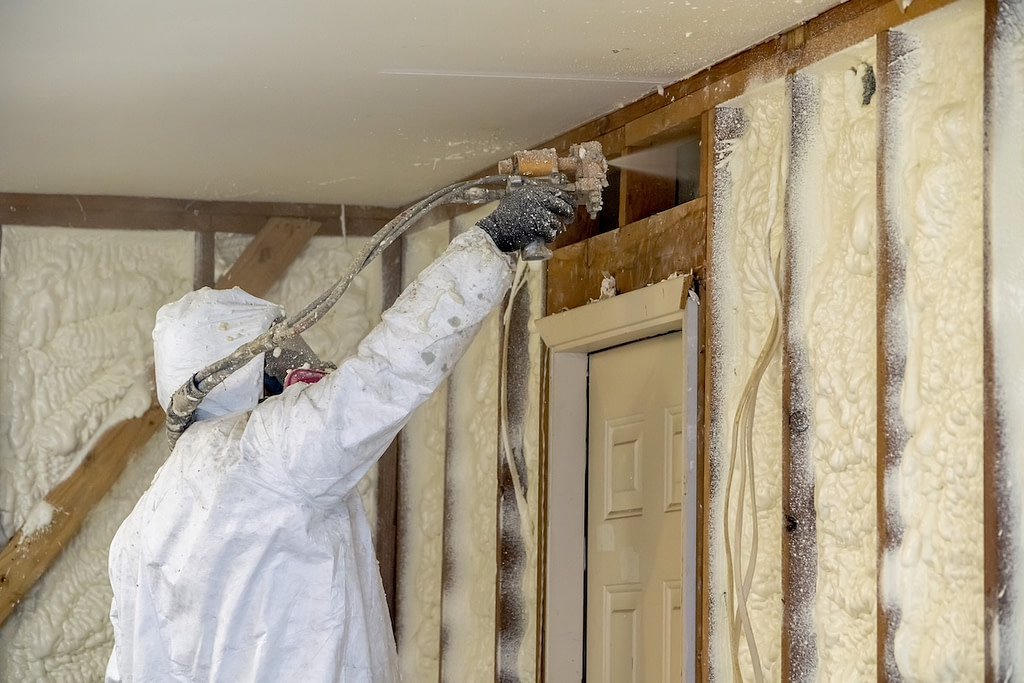
6. Safety and Ventilation Concerns
- Protective gear required: Gloves, masks, and eye protection are necessary.
- Fume exposure: Chemicals can release strong odors during application.
- Ventilation needs: Proper airflow is essential during and after installation.
Safety precautions are critical when working with spray foam products.
Best Areas to Use DIY Spray Foam Insulation
DIY spray foam insulation works best in smaller, targeted areas where air leaks are common.
Attic Gaps and Penetrations
- Sealing openings: Around vents, wiring, and pipes in the attic ceiling.
- Preventing heat loss: Reduces energy loss through the attic.
- Improved insulation performance: Supports existing insulation.
Attics are one of the most common areas for spray foam use.
Rim Joists and Crawl Spaces
- Air sealing: Prevents drafts entering from below the home, especially along the floor area near rim joists or sill plates where access is tight.
- Moisture control: Helps protect against damp conditions.
- Energy efficiency: Reduces heat transfer in critical areas.
These areas often benefit significantly from spray foam application.
Windows and Doors
- Gap filling: Seals spaces around frames.
- Draft prevention: Improves indoor comfort.
- Easy application: Small areas are ideal for DIY projects.
Spray foam is effective for sealing small openings.
Tips for Successful DIY Spray Foam Installation
Applying spray foam correctly is key to achieving good results. These tips help homeowners improve performance and avoid common mistakes.
Prepare the Surface Properly
- Clean area: Remove dust, dirt, and debris.
- Dry surfaces: Ensure no moisture is present.
- Clear obstacles: Make the area easy to access.
Proper preparation ensures better adhesion and performance.
Follow Temperature Guidelines
- Check product instructions: Each kit has recommended temperature ranges.
- Warm materials if needed: Cold temperatures can affect expansion.
- Avoid extreme conditions: Both hot and cold environments impact results.
Temperature control is critical for proper foam expansion.
Apply in Layers
- Thin applications: Prevents overexpansion and waste.
- Even coverage: Helps achieve consistent insulation.
- Allow curing time: Let each layer set before adding more.
Layering improves both performance and appearance.
Use Proper Safety Equipment
- Protective clothing: Wear gloves and long sleeves.
- Respiratory protection: Use a mask to avoid inhaling fumes.
- Eye protection: Prevent contact with chemicals.
Safety should always be a top priority during installation. Pros use commercial-grade, high-pressure rigs, and that stuff actively heats and accurately meters the chemicals for a proper cure, 100% curing, optimal expansion yield, and more consistent insulation value.
When DIY Spray Foam May Not Be the Best Option
While DIY spray foam insulation works well for smaller projects, it may not be suitable for every situation.
Large Insulation Projects
- Extensive coverage: Large areas require more material and expertise.
- Consistency challenges: Difficult to achieve uniform coverage.
- Higher costs: Multiple kits can become expensive.
Large projects are often better handled with professional equipment.
Complex Areas
- Hard-to-reach spaces: Difficult to apply evenly.
- Structural concerns: Incorrect application can affect building performance.
- Ventilation requirements: Larger spaces require proper airflow management.
For complex retrofits or larger jobs, it may be better to hire a professional company using systems such as Tiger Foam when appropriate.
Complex areas may require specialized knowledge.
Make the Right Choice for Your Insulation Project
Understanding the pros and cons of diy spray foam insulation helps homeowners decide if it is the right solution for their needs. While it offers excellent air sealing and energy efficiency, proper application and safety precautions are essential for success.
Insulation plays a major role in your home’s comfort, energy efficiency, and long-term performance. Knowing your options helps you make informed decisions that benefit your home.
Why Homeowners Trust Young Construction
- Exterior and efficiency expertise: Helping homeowners understand insulation and energy solutions.
- Commitment to quality: Focused on long-lasting home improvements.
- Trusted guidance: Providing clear, reliable information for better decisions.
Take the next step toward a more efficient home. Contact Young Construction today for a free estimate and learn how expert solutions can improve your home’s comfort and performance.