Proper gutter installation is one of the most important home improvement projects you can tackle to protect your property from water damage. A well-installed gutter system keeps rainwater flowing safely away from your roof, walls, and foundation, preventing costly structural issues down the line. Whether you’re upgrading old gutters or installing new ones, following the right steps ensures long-term durability and dependable performance.
- Prevents water damage: Gutters channel rainwater away from your home to avoid leaks and rot.
- Protects landscaping: Proper drainage stops erosion and flooding around flower beds.
- Improves curb appeal: A seamless gutter system enhances the appearance and function of your exterior.
Why Gutter Installation Matters
Gutters may not seem like a glamorous home feature, but they play a major role in protecting your home’s structure. When installed correctly, gutters direct water away from siding, foundations, and walkways. Poorly installed systems, on the other hand, can lead to leaks, sagging, and even foundation cracks.
Professional gutter installation provides proper slope, secure mounting, and sealed joints that ensure your system performs efficiently through heavy rain or melting snow. Doing the job right from the start helps your gutters last longer and saves you money on maintenance and repairs.
Understanding the Basics of Gutter Installation
Before diving into the installation process, it’s important to know how a gutter system works and what components you’ll need. Each part contributes to proper water flow and system stability, so overlooking even one detail can affect performance.
Main Components of a Gutter System
A complete gutter system consists of several essential parts that work together to manage water runoff. Each piece must be installed correctly for the system to function effectively.
- Gutter sections: The horizontal channels that collect rainwater from the roof edge.
- Downspouts: Vertical pipes that carry water from the gutters to the ground or drainage area.
- Elbows: Connect gutter sections to downspouts and direct water away from the foundation.
- Hangers and brackets: Secure gutters to the fascia board and maintain proper slope.
- End caps: Seal the ends of gutters to prevent leaks.
Choosing the Right Gutter Material
The material you select affects both appearance and longevity. Common gutter materials vary in price, durability, and maintenance needs.
- Aluminum: Lightweight, rust-resistant, and cost-effective for most homes.
- Vinyl: Affordable and easy to install, though less durable in extreme weather.
- Steel: Strong and durable but may require periodic painting to prevent rust.
- Copper: Long-lasting and stylish, often chosen for premium homes.
5 Steps for Proper Gutter Installation
Following a clear, step-by-step process ensures your gutters perform well and last for years. Skipping or rushing through these steps can lead to leaks, sagging, or inefficient drainage.
Step 1: Measure and Plan Your Layout
Before any installation begins, accurate measurement is key. This step ensures your gutter system fits perfectly and has the correct slope for water flow.
Measure the length of your roofline and determine where downspouts will be located. Gutters should slope about a quarter inch for every ten feet toward the downspouts. Mark these points using a chalk line to visualize your slope. Planning the layout in advance also helps determine how many sections, hangers, and connectors you’ll need.
Step 2: Cut and Prepare Gutter Sections
Once measurements are complete, it’s time to cut gutter sections to the appropriate lengths. This step requires careful precision to avoid rough edges or misaligned joints that can cause leaks later.
Use a fine-tooth hacksaw or specialized gutter cutting tool. If working with aluminum or copper, handle edges carefully to avoid bending. Before attaching, install end caps securely using gutter sealant to ensure watertight joints. Preparing all sections before mounting saves time and ensures a smoother installation process.
Step 3: Install Gutter Hangers and Brackets
The hangers and brackets are what keep your gutters firmly attached to the fascia board. Correct spacing and alignment prevent sagging and maintain consistent water flow.
Position hangers about every 24 to 36 inches along the gutter run. Secure each bracket firmly into the fascia board with corrosion-resistant screws. At this stage, check that the slope you marked earlier remains intact and continuous toward each downspout. An accurate slope is what ensures proper drainage and prevents standing water.
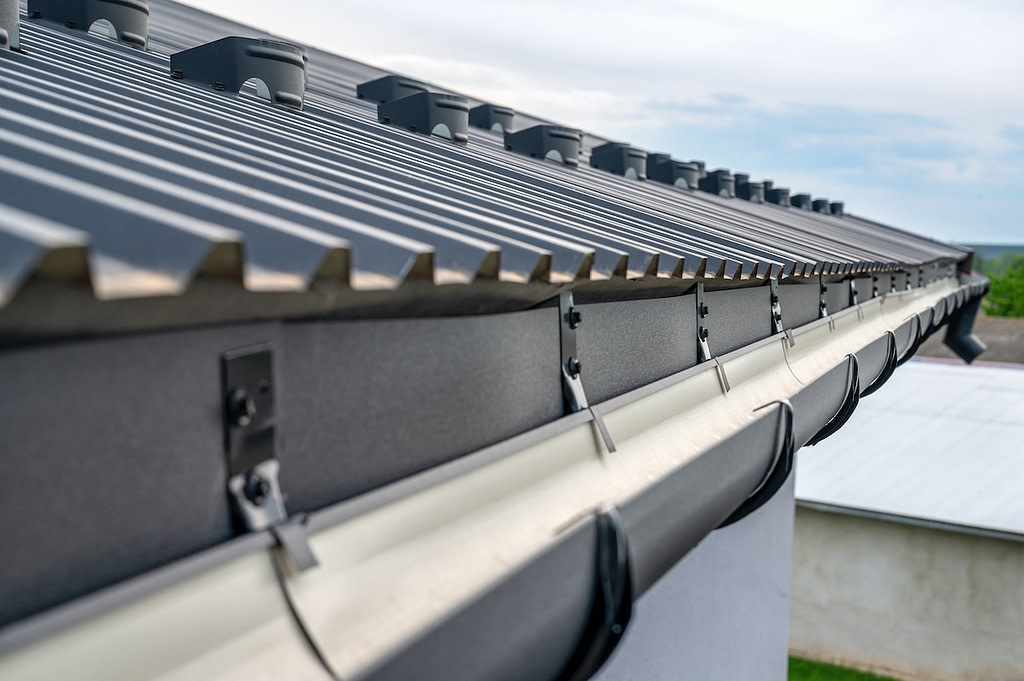
Step 4: Mount the Gutters and Attach Downspouts
Once the brackets are installed, it’s time to mount the gutter sections themselves. This is the most visible and rewarding step, but precision is still essential to achieve a watertight system.
Set each section into its hangers, overlapping pieces slightly at joints and sealing with silicone or a high-quality gutter sealant. Once the gutters are mounted, install the outlet fittings for your downspouts and secure them to the wall using straps or brackets. Each downspout should extend several feet away from your foundation or connect to an underground drain to carry water safely away.
Step 5: Seal, Test, and Inspect the System
The final step of gutter installation ensures everything is working properly. Testing and inspecting your work now will save headaches later by preventing leaks or misalignments.
Apply sealant to all end caps, seams, and downspout connections. Once dry, run water through the system with a garden hose to confirm smooth flow and identify any leaks or blockages. Check that downspouts direct water far enough from the house and that all joints are secure. A final inspection ensures your system is ready to handle heavy rain confidently.

Common Gutter Installation Mistakes to Avoid
Even small errors during installation can lead to serious water damage over time. Taking care to avoid these common mistakes will help ensure your gutter system performs perfectly.
Incorrect Slope
If gutters don’t slope properly toward the downspouts, water will pool instead of draining efficiently. Standing water can lead to rust, corrosion, and sagging. Always double-check your slope before final installation.
Insufficient Fasteners
Using too few brackets or hangers is one of the most common issues. Without proper support, gutters can detach from the fascia during heavy rainfall. Ensure hangers are spaced evenly and tightly secured.
Poorly Sealed Joints
Unsealed or poorly connected joints will cause leaks that damage siding and fascia boards. Use high-quality sealant on all seams and recheck after the first few rainfalls to ensure a complete seal.
Wrong Downspout Placement
Placing downspouts too close together or too far apart can lead to overflow during storms. Strategically space them to handle water efficiently across your roofline.
When to Replace vs. Reinstall Gutters
Sometimes, gutter problems can be fixed with small repairs. Other times, replacing the system entirely is the smarter long-term investment. Understanding the signs can help you decide which route to take.
Signs You Can Repair
- Minor leaks: Small drips at seams can often be resealed.
- Loose brackets: Refastening hangers usually solves sagging issues.
- Single damaged sections: Replacing one segment can restore full function.
Signs You Should Replace
- Widespread rust or cracks: Indicates structural failure in metal gutters.
- Frequent overflow: Suggests improper slope or system size.
- Peeling paint or fascia rot: Shows long-term water exposure that new gutters can prevent.
If your gutters are more than 15 to 20 years old, a complete replacement may be the most efficient way to protect your home’s structure and improve drainage.
Tips for Long-Lasting Gutters
Proper maintenance is key to maximizing the lifespan of your gutter system. Once installation is complete, follow these care practices to keep everything functioning efficiently.
- Clean regularly: Remove debris and leaves at least twice per year.
- Inspect after storms: Check for dents, leaks, or dislodged sections.
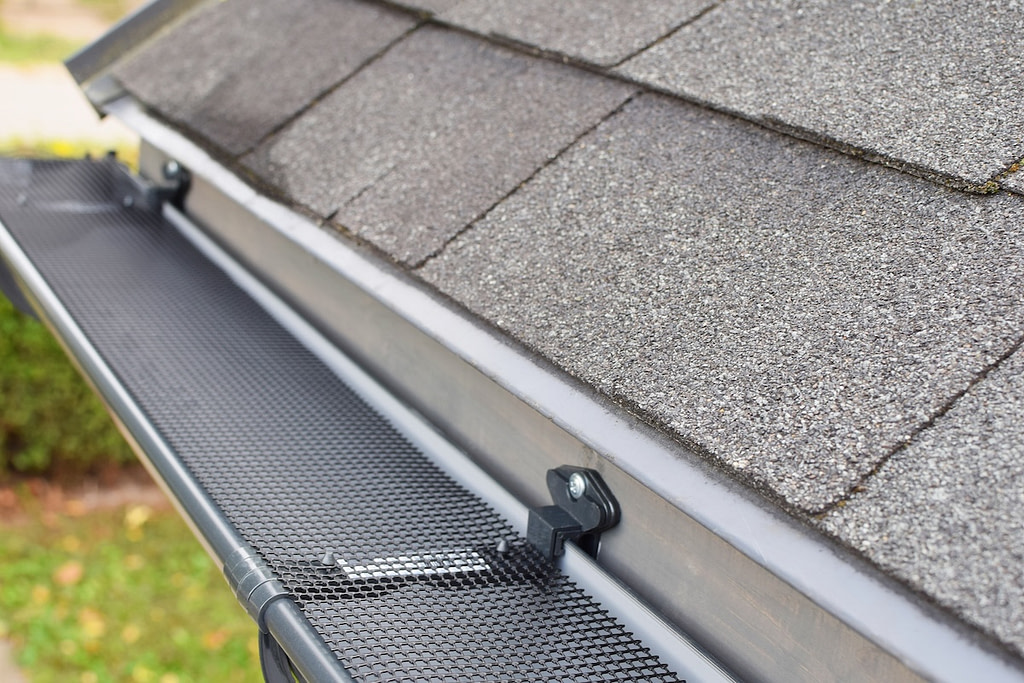
- Add gutter guards: Prevent buildup and reduce cleaning frequency.
- Monitor drainage: Ensure downspouts consistently carry water away from your foundation.
Why Choose Young Construction for Gutter Installation
When it comes to protecting your home from water damage, Young Construction specializes in professional gutter installation done right the first time. Our skilled team uses durable materials, precise measurements, and proven installation techniques to ensure long-lasting performance and clean, attractive results.
We handle every step of the process — from inspection to installation and final testing — so homeowners can have complete confidence in their system. Whether your home needs seamless gutters, new downspouts, or full replacement, we deliver solutions designed to last through every season.
If you’re planning a gutter installation or upgrade, contact Young Construction today for a free quote. Our experienced team will help you choose the right materials and design a system that protects your home beautifully for years to come.