When cold weather sets in, ice dam roof damage becomes one of the most serious winter roofing problems homeowners can face. Ice dams form when snow on the roof melts, runs down to colder edges, and refreezes, creating a ridge of ice that traps water. This trapped water can then seep beneath shingles and into your home, leading to leaks, rot, and insulation damage if not identified and addressed quickly.
- Winter hazard awareness: Understanding how ice dams form protects your roof.
- Damage detection: Spotting early warning signs prevents costly interior repairs.
- Step-by-step repair tips: Taking action keeps your home dry and your roof stable.
What Are Ice Dams and Why They Form

An ice dam is a ridge of ice that forms at the edge of a roof and prevents melting snow from draining properly. The heat from your attic warms the roof surface, melting the snow above. That water flows down until it reaches the colder eaves and refreezes. Over time, this cycle builds a dam of ice that blocks further drainage.
These conditions are especially common in climates with wide temperature swings between day and night. Without proper attic insulation and ventilation, your roof can trap heat that accelerates snow melting, setting the stage for ice dam formation.
How Ice Dam Roof Damage Happens
Once an ice dam forms, water backs up behind it and can seep under your shingle layers. Roof sheathing, underlayment, and even interior ceilings become vulnerable to moisture infiltration. This situation often leads to damaged insulation, stained ceilings, warped wood, and mold growth.
Ice dams also place excess weight on gutters and roof edges, which can cause them to pull away fromthe home or collapse under pressure. Addressing the root causes and warning signs quickly can preserve your home’s structure and avoid major repairs.
6 Warning Signs of Ice Dam Roof Damage
Spotting these early warning signs helps you act before small leaks turn into significant structural problems. Many of these clues show up inside your home before they become obvious on the exterior roof.
1. Water Stains on Ceilings or Walls
One of the most visible early indicators of ice dam roof damage is brown or yellow stains on your ceilings or upper walls. These stains often appear after a thaw or during a prolonged cold spell.
- Why it matters: Water stains show that moisture has penetrated interior ceilings.
- What to do: Investigate the attic above the stain for signs of water intrusion.
Even small stains may mean water has already traveled through your roof system, so prompt attention is essential.
2. Peeling Paint or Bubbling Drywall
Moisture entering your home can cause paint to peel or drywall to bubble or warp. These issues often appear near exterior walls or on upper floors first.
- Why it matters: Bubbling or peeling signals trapped moisture behind surfaces.
- What to do: Examine attic insulation and roof decking for wet spots.
This sign often accompanies ceiling stains and can be a precursor to mold growth if left untreated.
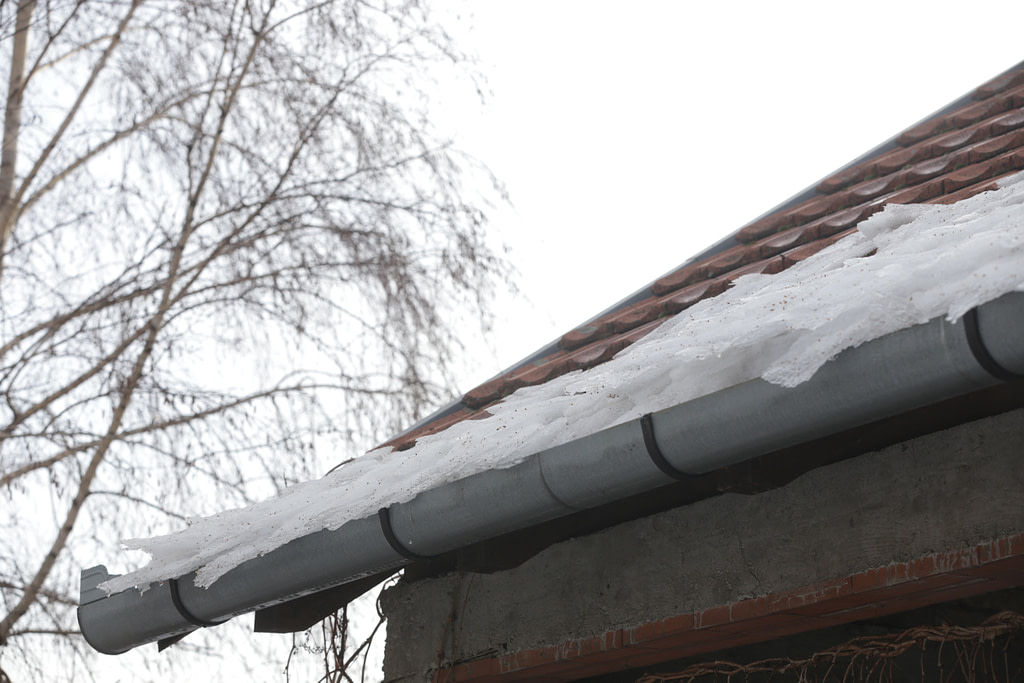
3. Icicles Forming Along Roof Edges
Large icicles hanging from eaves or gutters are not just a safety concern for people below. They are a visual cue that the conditions for ice dams exist on your roof.
- Why it matters: Icicles show melting snow and refreezing water at roof edges.
- What to do: Have a professional assess your roof for ice dam formation.
The presence of icicles alone does not guarantee damage, but they are a strong early indicator.
4. Damp or Rotted Attic Insulation
Insulation that feels damp to the touch or shows signs of rot indicates moisture intrusion that may be linked to ice dams above. This problem often goes unnoticed until significant damage has occurred.
- Why it matters: Wet insulation loses its effectiveness and can contribute to heat loss.
- What to do: Inspect insulation and replace wet sections promptly.
Addressing wet insulation helps improve energy efficiency and prevents further roof system damage.
5. Cracked or Curling Shingles
The freeze-thaw cycle that accompanies ice dams can stress roofing materials, leading to cracked, split, or curling shingles.
- Why it matters: Damaged shingles allow water to enter beneath the roof surface.
- What to do: Replace damaged shingles and assess the underlying roof deck.
Shingle issues often appear after repeated ice dam formation and can indicate advanced roof wear.
6. Sagging Gutters or Roof Edges
The weight of ice and trapped water can pull gutters away from fascia boards or create visible dips at the roof’s edge.
- Why it matters: Sagging gutters compromise water drainage and increase stress on roof edges.
- What to do: Reinforce or replace gutters and examine the roof fascia for rot.
Structural damage at the edge of the roof often requires both exterior and interior inspection.
Repair Tips After Ice Dam Roof Damage
Once you suspect damage from ice dams, prompt action helps stop further issues. These repair tips focus on both immediate fixes and long-term improvements to prevent recurrence.
Remove the Ice Dam Safely
Removing ice dams should be done carefully to avoid roof surface damage. Avoid using sharp tools or climbing without proper safety equipment.
- Use calcium chloride: Apply through a sock or mesh to melt ice gradually.
- Avoid chiseling: Hard impacts can crack shingles or dent metal roofing.
- Work from the ground: Use long-handled tools safely where possible.
If ice dams are large or difficult to reach, consider hiring a trained professional for safe removal.
Patch Leaks and Seal Entry Points
After water has entered your home, sealing those leaks is critical. Attention should be given both inside and outside to prevent recurring issues.
- Interior protection: Use tarps or buckets to catch ongoing drips until repairs are made.
- Exterior sealing: Apply roofing cement or waterproof sealant around compromised areas.
- Replace underlayment: If moisture reached beneath shingles, new underlayment may be needed.
Addressing leaks quickly keeps interior damage from spreading.
Repair or Replace Damaged Shingles
Shingles damaged by ice or trapped water can compromise your roof’s integrity.
- Replace broken shingles: Remove and install new shingles where needed.
- Match materials: Use shingles that match your existing roof for consistent protection.
- Inspect surrounding areas: Water can travel beneath nearby shingles before appearing.
Shingle repair is a common step after diagnosing ice dam damage.
Reinforce Flashing Around Roof Penetrations
Water often enters around skylights, vents, and chimneys when ice dams are present.
- Check flashing: Ensure metal flashing is tight and free of gaps.
- Seal joints: Apply waterproof sealant where flashing meets roof surfaces.
- Upgrade materials: Consider long-lasting materials like stainless steel where possible.
Strong flashing helps prevent water intrusion at vulnerable points.
Replace Damaged Insulation
If attic insulation has become damp or rotted, it must be replaced to maintain energy efficiency and prevent mold.
- Remove wet insulation: Dispose of damaged sections to prevent mold.
- Install new insulation: Choose high-performance materials appropriate for your climate.
- Check ventilation: Verify that vents are working to reduce attic heat buildup.
Dry insulation helps control indoor temperatures and prevents future ice dam formation.
Improve Attic Ventilation and Insulation
Long-term prevention of ice dams often involves balancing heat flow in your attic.
- Add insulation: Keep heat from escaping into the attic space.
- Ensure ventilation: Ridge vents, soffit vents, and gable vents help regulate temperature.
- Seal attic air leaks: Caulking and weatherstripping reduce heat transfer from living spaces.
Improved ventilation and insulation reduce the conditions that cause ice dams.
How to Prevent Ice Dams Next Winter
Preventing future ice dam roof damage begins long before winter arrives. Homeowners can take proactive measures to reduce the risk of ice dam formation.
Regular Roof Inspections
- Twice yearly: Inspect your roof before winter and after spring.
- Watch for weak spots: Check for loose shingles or damaged flashing.
- Monitor attic condition: Ensure insulation and ventilation remain effective.
Routine checks make it easier to catch issues before storms hit.
Maintain Attic Insulation
- Increase R-value: Higher insulation levels reduce heat loss into the attic.
- Seal air leaks: Look for gaps around recessed lighting and ductwork.
- Balance airflow: Proper intake and exhaust vents help maintain even attic temperatures.
Energy efficiency improvements help prevent the conditions that create ice dams.
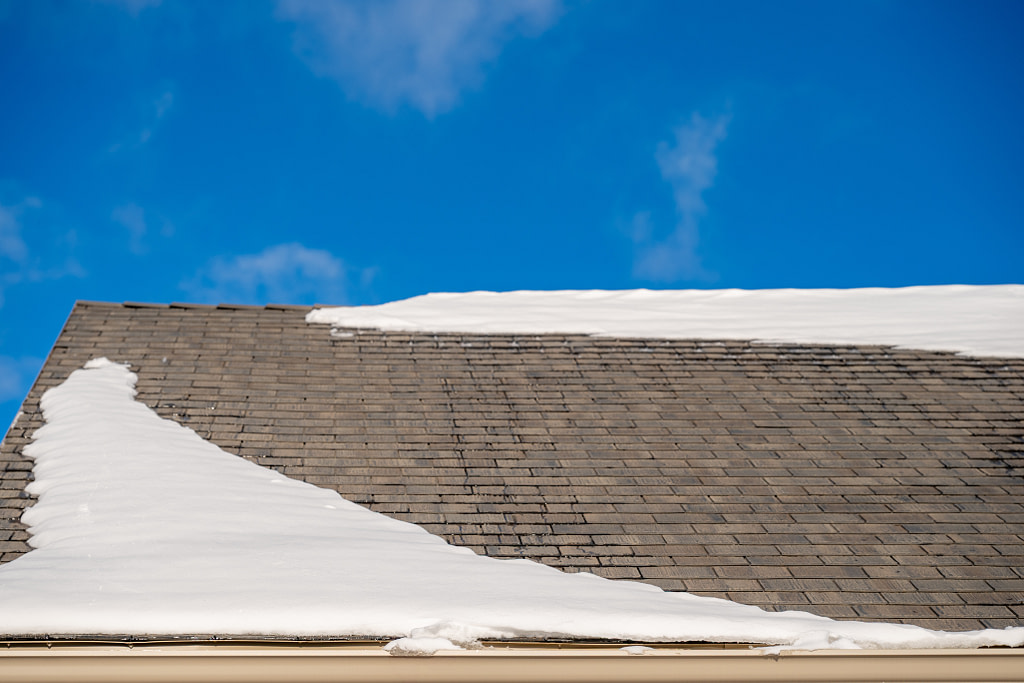
Remove Snow Safely
After heavy snowfalls, removing excess snow from your roof can reduce the amount of meltwater that contributes to ice dams.
- Use a roof rake: Safely remove snow from the ground with a long-handled tool.
- Avoid climbing: Slippery conditions can make roof work dangerous.
- Work in layers: Remove snow in thin layers for safety.
Removing snow regularly helps keep your roof clear and reduces ice buildup.
Winter Roof Wisdom: Keep Your Home Safe and Dry
Ice dam roof damage can lead to major repairs if left unchecked. By knowing the warning signs and following practical repair tips, homeowners can protect their roofs and avoid costly interior damage. Proactive maintenance combined with early repair helps ensure your roof stays strong throughout the cold season and beyond.
Protect your home through every winter season. Contact Young Construction today for a free estimate and discover how expert guidance can help you keep your roof resilient, efficient, and problem-free for years to come.