Insulation with vapor barrier is one of the most effective ways to control moisture inside your walls, ceilings, and floors, protecting both your home’s structure and the performance of the insulation itself. A vapor barrier is a material that slows water vapor from passing through building assemblies, and when it is paired correctly with insulation, it stops the condensation that leads to mold, rot, and ruined insulation. The catch is that placement and climate matter enormously, since a barrier on the wrong side can cause the very damage it is meant to prevent. Here is what this guide covers:
- Why it matters: How a vapor barrier protects your home from moisture, mold, and structural decay.
- Where it goes: The right placement for a vapor barrier based on your climate zone.
- When to use one: The situations and code requirements that call for a vapor barrier.
What Is a Vapor Barrier and How Does It Work?
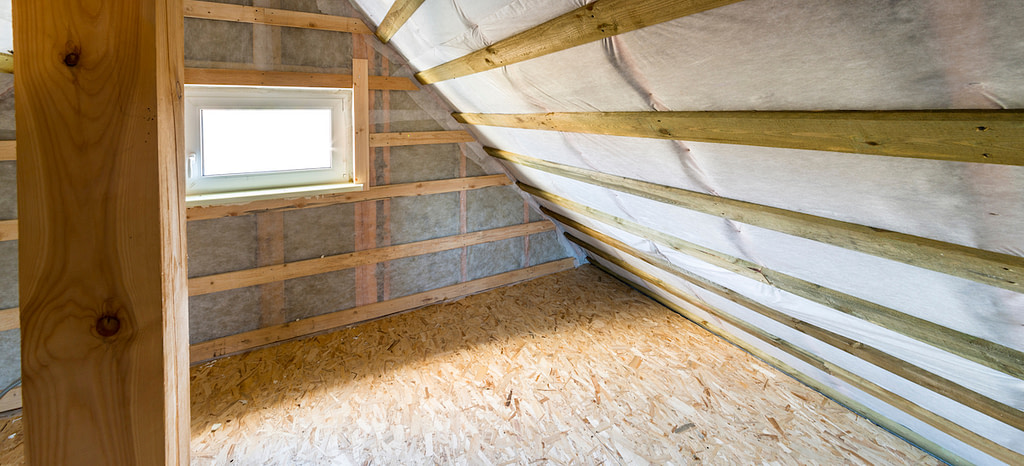
A vapor barrier, more accurately called a vapor retarder, is a material that limits how much water vapor diffuses through walls, ceilings, and floors. Paired with insulation, it keeps moisture from migrating into the assembly and condensing where it can cause damage, which keeps the insulation dry and working at full strength.
How Does a Vapor Barrier Protect Your Home?
A vapor barrier protects your home by blocking water vapor from reaching surfaces cold enough to make it condense into liquid water inside your walls and ceilings. Without that control, everyday moisture from cooking, showering, and breathing migrates into the wall cavity, hits the cold sheathing, and condenses, soaking the insulation and framing over time. That trapped moisture is what fuels mold growth, wood rot, and the loss of insulating value. By slowing vapor movement, the barrier keeps the cavity dry and preserves both the structure and the insulation’s R-value. For homes in Charles City and surrounding areas, that protection is especially valuable through long, cold winters.
- Condensation control: Slows vapor before it reaches cold surfaces and turns to water.
- Mold prevention: A dry cavity denies mold and mildew the moisture they need.
- Rot protection: Keeping framing dry guards against wood decay over time.
- Preserved R-value: Dry insulation performs at its rated thermal resistance.
What Are the Different Classes of Vapor Retarders?
Vapor retarders are grouped into classes by how much vapor they allow through, measured by a permeability rating, ranging from nearly impermeable to relatively open. Class I retarders such as polyethylene sheeting block almost all vapor, Class II such as kraft-faced batt insulation slow it significantly, and Class III such as latex paint on drywall are the most permeable. Smart or responsive membranes change their permeability with humidity, opening to allow drying in summer and tightening in winter. Choosing the right class depends on your climate and wall assembly, since too tight a barrier in the wrong spot can trap moisture. Matching the class to the situation is what makes the system work.
- Class I: Nearly impermeable, such as polyethylene sheeting.
- Class II: Slows vapor significantly, such as kraft-faced insulation.
- Class III: More permeable, such as latex paint on drywall.
- Smart membranes: Adjust permeability with humidity to allow seasonal drying.
Why Does Insulation with Vapor Barrier Matter So Much?
Insulation and a vapor barrier work as a team, and getting that pairing right matters because the two together determine whether your wall stays dry or slowly destroys itself. Insulation alone slows heat transfer, but without moisture control the cavity can accumulate water that undermines everything.
How Do Insulation and Vapor Barriers Work Together?
Insulation and vapor barriers work together by managing heat and moisture at the same time, with insulation creating a temperature difference across the wall and the barrier controlling where vapor can travel through it. The insulation keeps one side of the assembly warm and the other cold, and that temperature gradient is exactly what creates a condensation risk at the cold surface. The vapor barrier, placed correctly, intercepts moisture before it reaches that cold point. When the two are coordinated, the wall stays dry and the insulation delivers its full thermal value. When they are not, the insulation can become a wet, ineffective sponge inside the wall.
- Heat and moisture: Insulation manages heat while the barrier manages vapor.
- Temperature gradient: Insulation creates the cold surface where vapor can condense.
- Intercepting vapor: A correctly placed barrier stops moisture short of that surface.
- Coordinated system: The two together keep the cavity dry and efficient.
What Happens If You Skip or Misplace the Barrier?
Skipping or misplacing a vapor barrier can lead to condensation, soaked insulation, mold, and structural rot, often hidden inside the wall until the damage is significant. A barrier installed on the wrong side, such as the interior in a hot, humid climate, traps moisture against a cold surface rather than blocking it, which is worse than having none at all. Gaps, unsealed seams, and tears also undermine the barrier and let vapor slip through to condense. Because the damage develops out of sight, homeowners often discover it only when mold appears or a musty smell sets in. Correct placement and a continuous, well-sealed installation are what prevent these costly failures.
- Hidden condensation: Moisture collects inside the wall where it is hard to detect.
- Wrong-side risk: A barrier on the wrong side traps moisture instead of blocking it.
- Seal failures: Gaps and tears let vapor bypass the barrier entirely.
- Costly damage: Mold and rot can require major repairs once discovered.
Where Should a Vapor Barrier Be Placed?
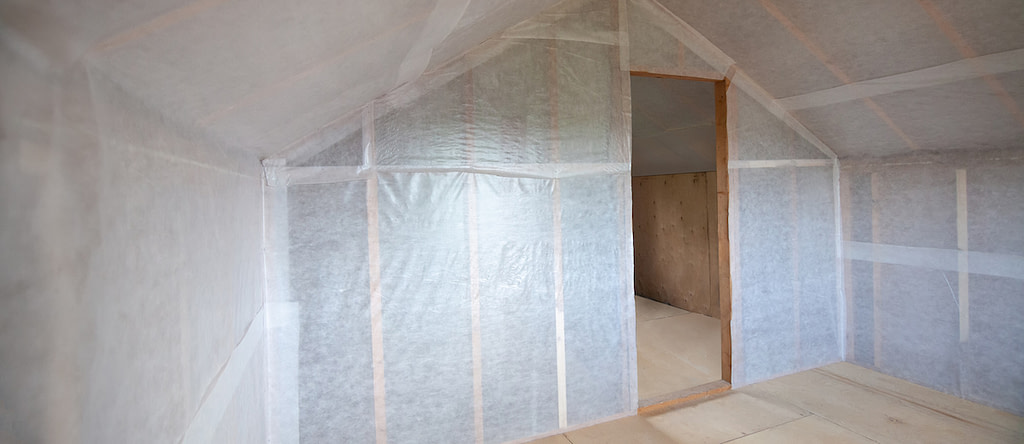
Vapor barrier placement depends almost entirely on your climate, since the barrier belongs on the warm side of the insulation, and which side is warm changes from region to region. Getting this right is the single most important decision in any vapor barrier installation.
Why Does Climate Determine Placement?
Climate determines placement because the warm side of the wall, where the barrier belongs, is the interior in cold climates and the exterior in hot, humid ones. In a heating-dominated climate like Iowa’s, indoor air is warm and moist for much of the year, so the barrier goes on the interior side to stop that moisture from migrating into the cold wall cavity. This is the situation that applies to homes in Charles City and surrounding areas. In a cooling-dominated climate, the situation reverses and the barrier shifts toward the exterior. Mixed climates with both cold winters and humid summers require careful analysis, often favoring smart membranes that adapt to the season. Understanding your zone is the foundation of a barrier that protects rather than harms.
- Cold climates: Barrier goes on the interior, warm-in-winter side.
- Hot, humid climates: Barrier shifts toward the exterior side.
- Mixed climates: Seasonal swings often call for smart, adaptive membranes.
- Zone first: Identifying your climate zone guides correct placement.
The placement rules are not just best practice, they are written into building code for colder regions. The International Residential Code requires a Class I or II vapor retarder on the interior side of frame walls in climate zones 5, 6, 7, 8, and Marine 4, which covers most of the northern United States including Iowa. For homeowners in Charles City and surrounding areas, knowing your zone tells you whether a barrier is required and where it must go.
How Important Is a Proper Seal?
A proper, continuous seal is critical because even a correctly placed vapor barrier fails if vapor can slip around it through gaps, seams, or penetrations. The barrier must extend across all required surfaces and be carefully sealed at edges, overlaps, and around obstacles like pipes, wiring, and electrical boxes. A single unsealed seam or torn section creates a path for moisture to bypass the barrier and condense inside the wall. This is why professional installation matters, since the difference between a system that works and one that quietly fails often comes down to the quality of the seal. Full coverage and tight sealing are non-negotiable for real moisture protection.
- Continuous coverage: The barrier must span every required surface without gaps.
- Sealed seams: Overlaps and edges need careful sealing to stay effective.
- Penetration detail: Pipes, wires, and boxes are common leak points.
- Installation quality: A tight, professional seal is what makes the barrier work.
4 Situations When You Need Insulation with a Vapor Barrier
Not every wall in every climate needs a vapor barrier, but several common situations call for one to protect against moisture damage. The scenarios below are the most frequent cases where pairing insulation with a vapor barrier is the right move.
1. Cold-Climate Exterior Walls
Cold-climate exterior walls are the most common place a vapor barrier is needed, since heated indoor air pushes moisture toward the cold wall cavity all winter. In climate zones 5 through 8, including Iowa, code calls for a Class I or II vapor retarder on the interior side of frame walls to stop that vapor before it condenses. Kraft-faced batt insulation often satisfies this requirement while insulating at the same time. Skipping the barrier in these walls invites condensation, soaked insulation, and eventual rot. This is the textbook case for insulation with a vapor barrier.
- Code-driven: Zones 5 to 8 require an interior Class I or II retarder.
- Winter moisture: Warm indoor air drives vapor toward the cold cavity.
- Combined product: Kraft-faced batts insulate and retard vapor together.
- High stakes: Skipping the barrier risks condensation and rot.
2. Basements and Crawl Spaces
Basements and crawl spaces often need vapor control because they sit against soil that constantly releases moisture into these below-grade areas. A vapor barrier on the ground and walls helps keep that earth-driven humidity from reaching insulation and framing, where it would cause mold and decay. Closed-cell spray foam is frequently used here because it acts as both insulation and a vapor barrier in one application. Proper detailing keeps these spaces dry and protects the rooms above them. Controlling moisture in these zones is essential for a healthy home.
- Earth moisture: Soil constantly releases humidity into below-grade spaces.
- Mold risk: Damp basements and crawl spaces breed mold and decay.
- Dual-purpose foam: Closed-cell spray foam insulates and seals vapor at once.
- Whole-home benefit: Drier lower levels protect the living spaces above.
3. Bathrooms and High-Humidity Rooms
Bathrooms, kitchens, and laundry rooms generate far more moisture than other spaces, making vapor control important in their exterior walls and ceilings. The steam from showers and the humidity from cooking and laundry add a heavy vapor load that can overwhelm an unprotected assembly. Pairing insulation with a properly placed vapor barrier in these rooms keeps that extra moisture from condensing in the walls. Good ventilation works alongside the barrier to manage the humidity these spaces produce. Targeting these high-moisture rooms prevents localized damage.
- Heavy vapor load: Showers, cooking, and laundry add concentrated moisture.
- Localized risk: Unprotected walls in these rooms are prone to condensation.
- Barrier plus venting: Vapor control and ventilation work together here.
- Targeted protection: Focusing on wet rooms prevents hidden damage.
4. Insulation Upgrades and Retrofits
Insulation upgrades and retrofits are a key opportunity to add or correct a vapor barrier, since the walls are already open or being improved. Older homes often have no barrier, an improperly placed one, or a damaged one, and a retrofit is the natural moment to fix it. Adding insulation without addressing vapor control can actually create new moisture problems by changing how the wall dries. A professional evaluates the existing assembly and recommends the right barrier strategy for the upgrade. Coordinating both at once protects the investment in new insulation.
- Open walls: Retrofits expose the cavity, making barrier work practical.
- Older homes: Many lack a barrier or have one placed incorrectly.
- Drying changes: New insulation alters how a wall manages moisture.
- Coordinated upgrade: Addressing both protects the new insulation.
Frequently Asked Questions
Do I always need a vapor barrier with insulation?
No, not every situation requires a vapor barrier, since the need depends on your climate zone, the assembly, and local code. In cold climates like Iowa’s, code generally requires one on the interior side of exterior frame walls, while warm-humid climates may not require one at all. A professional can confirm what your specific home needs.
Which side of the insulation does the vapor barrier go on?
The vapor barrier goes on the warm side of the insulation, which is the interior side in cold climates and the exterior side in hot, humid climates. In Iowa’s heating-dominated climate, that means the interior side of exterior walls. Placing it on the wrong side can trap moisture and cause damage.
Is a vapor barrier the same as an air barrier?
No, a vapor barrier slows water vapor diffusion through materials, while an air barrier stops moving air from leaking through the assembly. Some materials, like certain membranes and closed-cell spray foam, can perform both functions. Both are important for a dry, efficient home, but they address different problems.
Can a vapor barrier cause mold?
Yes, a vapor barrier placed on the wrong side or installed over damp materials can trap moisture and actually promote mold rather than prevent it. This is why correct placement and a dry, clean surface are essential before installation. A professional assessment helps avoid this common and costly mistake.
Does kraft-faced insulation count as a vapor barrier?
Kraft-faced batt insulation has an asphalt-coated paper facing that acts as a Class II vapor retarder, satisfying code in many cold-climate walls. It conveniently combines insulation and vapor control in one product. The facing must be installed toward the warm interior side to work correctly.
Should I add a vapor barrier to an older home?
It depends on the existing wall assembly, climate, and condition of the home, so it is best evaluated case by case before adding one. Adding a barrier incorrectly to an older wall can create moisture problems where none existed. A professional can assess whether and how to add vapor control during an insulation upgrade.
Trust Young Construction for Insulation Done Right

When it comes to insulation with vapor barrier, Young Construction brings over 20 years of local experience and a deep understanding of how Iowa’s cold winters and humid summers move moisture through a home. We evaluate your walls, attic, and below-grade spaces, recommend the right insulation and vapor control strategy for our climate zone, and install it with the proper placement and sealing that make the system actually work. As a family-owned, fully licensed and insured company with more than 150 five-star reviews, we treat your home with genuine care and explain every recommendation in plain terms. If you are planning an insulation upgrade, dealing with drafts or moisture, or building new, now is the time to make sure your insulation and vapor barrier are working together rather than against each other. Contact Young Construction today to schedule your insulation consultation and estimate, and let our team protect your home from the inside out.