


Whether you’re a new homeowner or have been living in your house for decades, maintaining your roof is crucial to protecting your home from the elements.
One often overlooked yet essential component of your roofing system is roof flashing. Today, we’ll walk you through everything you need to know about roof flashing, including:
- What it is
- Why it matters
- Types of roof flashing
- Installation
- Maintenance tips
What is Roof Flashing?
Roof flashing refers to thin pieces of impervious material installed to prevent water penetration or to direct the flow of water away from certain areas of your roof. It’s typically made from metal, but you can also find flashing made from plastic, rubber, or composite materials. Flashing is installed at different joints and edges on your roof, where water tends to collect or where two roof surfaces meet, to ensure your home stays dry and free from leaks.
Why is Roof Flashing Important?
The primary purpose of roof flashing is to protect your roof and, consequently, your home, from water damage. Here are a few key reasons why roof flashing is important:
- Leak Prevention: By directing water away from critical areas, flashing prevents leaks that could lead to structural damage or mold growth.
- Extended Roof Lifespan: Properly installed flashing can extend the lifespan of your roof by preventing water-related wear and tear.
- Energy Efficiency: Effective flashing reduces heat loss and helps maintain the insulation properties of your roof, contributing to overall energy efficiency.
6 Types of Roof Flashing
There are several types of roof flashing, each designed for specific applications. Here are the most common types:
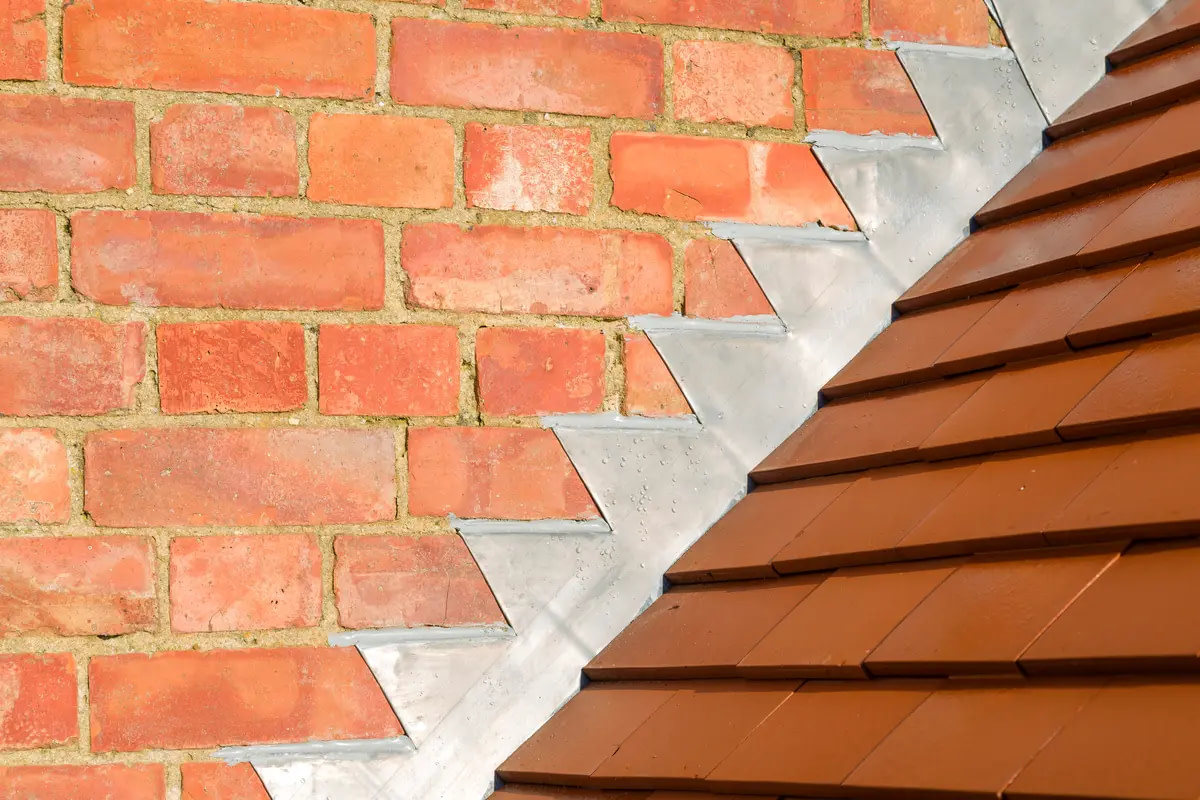
1. Step Flashing
Location: Used where the roof meets a wall or a chimney.
Description: Step flashing consists of small, rectangular pieces of metal bent at a 90-degree angle. These pieces are installed in a stair-step pattern alongside the shingles.
2. Continuous Flashing
Location: Also known as “apron flashing,” it’s used where a vertical wall intersects the roof.
Description: Continuous flashing is a long, single piece of metal that directs water away from the wall.
3. Valley Flashing
Location: Installed in the valleys where two roof planes meet.
Description: Valley flashing is typically a W-shaped piece of metal placed over the roofing material to channel water down the valley and off the roof.
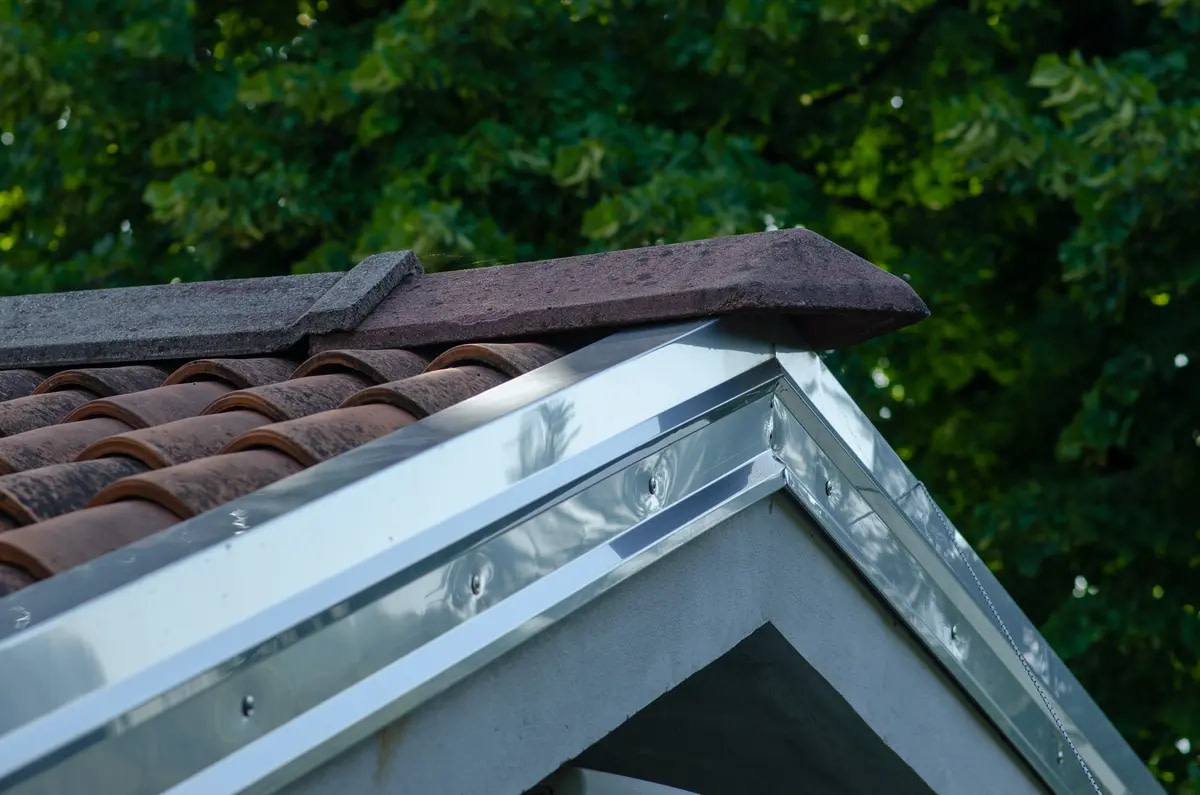
4. Drip Edge
Location: Installed along the edges of the roof, particularly at the eaves and rakes.
Description: Drip edge flashing is a metal strip that directs water away from the fascia and into the gutters, preventing water damage to the roof deck and fascia boards.
5. Vent Pipe Flashing
Location: Used around vent pipes and other protrusions through the roof.
Description: Vent pipe flashing features a conical shape that fits snugly around the pipe, with a flat base that sits under the shingles.
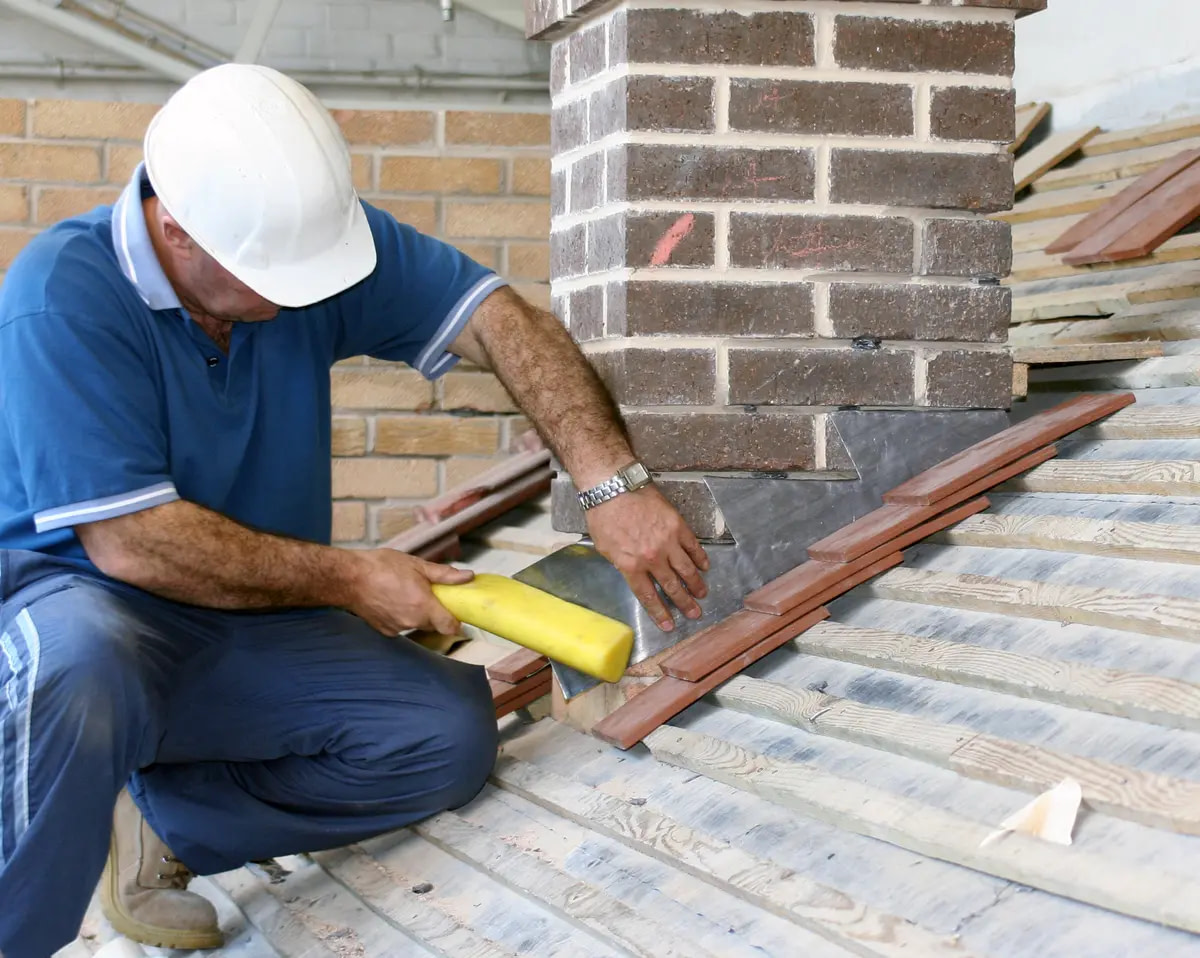
6. Counter Flashing
Location: Typically used with step flashing or around chimneys.
Description: Counter flashing is installed over step flashing to create a watertight seal. It’s often embedded into the chimney mortar or the wall.
Materials Used in Roof Flashing
Roof flashing can be made from various materials, each with its own advantages and disadvantages. Here’s a closer look at the most common materials:
Aluminum
✅ Pros:
- Lightweight and easy to work with.
- Rust-resistant.
- Affordable.
❌ Cons:
- Can corrode when in contact with alkaline materials like concrete.
- Less durable than other metals.
Copper
✅ Pros:
- Extremely durable and long-lasting.
- Corrosion-resistant.
- Aesthetic appeal.
❌ Cons:
- Expensive.
- Requires professional installation due to its weight and difficulty to work with.
Galvanized Steel
✅ Pros:
- Strong and durable.
- Less expensive than copper.
❌ Cons:
- Can rust over time if the protective zinc coating is damaged.
- Heavier and more challenging to install.
Lead
✅ Pros:
- Highly malleable and easy to shape.
- Extremely durable and long-lasting.
❌ Cons:
- Expensive.
- Health and environmental concerns due to toxicity.
Rubber or Plastic
✅ Pros:
- Flexible and easy to install.
- Inexpensive.
❌ Cons:
- Less durable and may degrade over time due to UV exposure.
How to Install Roof Flashing
Proper installation of roof flashing is crucial to its effectiveness. While it’s often best left to professionals, understanding the process can help you oversee the work and ensure it’s done correctly. Here’s a general overview of the installation process for some common types of flashing:
Installing Step Flashing
- Preparation: Start by removing shingles around the area where the flashing will be installed.
- Install Step Flashing: Place the first piece of step flashing over the shingle and against the wall or chimney. Nail it into place.
- Layer Shingles and Flashing: Lay the next course of shingles so that they cover the step flashing. Then, place the next piece of step flashing above the shingle, overlapping the first piece. Continue this process up the roof.
- Seal the Flashing: Apply roofing cement to seal any gaps between the flashing and the wall or chimney.
Installing Valley Flashing
- Preparation: Remove shingles along the valley.
- Lay Underlayment: Lay a strip of roofing underlayment along the valley for added protection.
- Install Valley Flashing: Lay the valley flashing centered in the valley. Nail it down at the edges, ensuring the nails are not placed in the middle of the valley where water flows.
- Cover with Shingles: Reinstall or lay new shingles over the valley flashing, leaving a small gap along the center of the valley to allow water flow.
Installing Drip Edge Flashing
- Preparation: Remove any existing shingles or underlayment along the roof edge.
- Install Drip Edge: Install the drip edge flashing along the eaves first, nailing it into place. Ensure it extends slightly over the edge of the roof.
- Add Underlayment: Lay the roofing underlayment over the drip edge at the eaves.
- Finish with Shingles: Install shingles over the underlayment, ensuring the drip edge at the rakes goes over the shingles.
Maintenance Tips for Roof Flashing
Maintaining your roof flashing is essential to ensure its longevity and effectiveness. Here are some maintenance tips to keep in mind:
🗓️ Regular Inspections
- Frequency: Inspect your roof flashing at least twice a year and after any major storms.
- What to Look For: Check for signs of rust, corrosion, loose nails, gaps, or any visible damage.
🧽 Cleaning
- Remove Debris: Clear leaves, twigs, and other debris that can accumulate around the flashing and impede water flow.
- Clean Metal Surfaces: Use a mild detergent and water to clean metal flashing and remove any dirt or grime.
🧰 Repairs
- Seal Gaps: Use roofing cement or caulk to seal any small gaps or cracks in the flashing.
- Replace Damaged Flashing: If you notice significant damage, such as rust or large cracks, replace the flashing to prevent leaks.
👷🏼♂️ Professional Help
- Hire a Roofer: If you’re unsure about the condition of your flashing or how to perform repairs, hire a professional roofer to conduct a thorough inspection and make necessary repairs.
Professional Installation For Your Roof Flashing Materials
Roof flashing is a critical component of your roofing system, protecting your home from water damage and ensuring the longevity of your roof. Understanding the different types of flashing, the materials used, and how to properly install and maintain it can help you take proactive steps in protecting your home.
If you’re unsure about any aspect of roof flashing or need professional assistance,contact Young Construction! For additional peace of mind, consider scheduling regular roof inspections to catch any issues early and keep your roof in top shape.
Take the time to invest in quality flashing and proper maintenance, and you’ll enjoy a leak-free, durable roof for years to come.