Every roof has small openings for plumbing vents, exhaust pipes, and HVAC systems, and protecting those openings requires reliable roof pipe flashing. This essential component seals gaps where pipes pass through the roof, preventing leaks, rot, and costly water damage. While it’s easy to overlook, damaged or aging pipe flashing is one of the most common causes of roof leaks in residential and commercial buildings.
- Leak prevention: Keeps water from entering around roof penetrations.
- Durability: Protects roof decking, insulation, and ceilings from moisture damage.
- Longevity: Helps extend the overall lifespan of your roofing system.
What Is Roof Pipe Flashing?
Roof pipe flashing is a waterproof seal installed around vent pipes or other penetrations that pass through the roof surface. It typically consists of a flexible boot (made from rubber, silicone, or metal) and a flange that integrates with the roofing material to create a watertight barrier.
When installed correctly, flashing redirects rainwater and melting snow away from the pipe opening and down the roof. This simple but vital barrier ensures that no moisture can enter through small gaps where the roof meets a protruding pipe.
Over time, UV exposure, temperature changes, and normal wear can cause flashing to deteriorate. Once it cracks, separates, or loses its seal, leaks can begin to form quickly — especially during heavy rainfall.
Why Roof Pipe Flashing Matters
Even small leaks around roof penetrations can lead to major interior damage if ignored. Moisture that seeps through flashing can soak insulation, stain ceilings, and promote mold growth. In severe cases, water intrusion may even damage roof decking or structural framing.
Properly installed and maintained flashing not only prevents leaks but also helps your roof system function efficiently. By directing water away from vulnerable points, it reduces the strain on shingles, underlayment, and gutters. This protection is especially important for roofs with multiple vent pipes or complex designs.
4 Common Leak Warning Signs Around Roof Pipe Flashing
Flashing failure isn’t always immediately visible from the ground. However, paying attention to these early warning signs can help homeowners catch issues before they escalate into expensive repairs.
1. Water Stains on Ceilings or Walls
One of the first indicators of a flashing leak is a water stain appearing on your ceiling or upper walls, often near bathrooms, kitchens, or laundry rooms where vent pipes exit the roof.
- Why it matters: Stains signal that water is seeping through the roof around the pipe, not from plumbing inside the wall.
- What to do: Inspect the roof above the stain to see if the pipe boot or flashing collar is cracked, loose, or corroded.
Catching this early can prevent long-term moisture damage to insulation and drywall.
2. Cracked or Brittle Flashing Boot
Rubber or plastic boots that seal around roof pipes can dry out, shrink, or crack over time. This allows water to slip between the boot and the pipe itself.
- Why it matters: Even small cracks can let water in during storms or snowmelt.
- What to do: Replace the boot immediately to restore a watertight seal and prevent leaks from spreading.
If your roof is more than 10 years old, it’s wise to check pipe boots annually, as UV rays can accelerate cracking.
3. Rust or Corrosion Around Metal Flashing
Metal flashing collars, especially those made of galvanized steel, can corrode after years of exposure to moisture. Rust weakens the metal, leading to gaps where water can enter.
- Why it matters: Corrosion compromises the flashing’s ability to redirect water effectively.
- What to do: Sand away rust, apply a rust-inhibiting primer, or replace corroded sections entirely for lasting protection.
Copper and stainless steel flashing offer greater corrosion resistance and are a smart upgrade during roof replacements.
4. Mold or Musty Odors in the Attic
If your attic smells damp or musty, you may have a hidden leak from damaged roof pipe flashing. Water entering through small openings can soak into wood decking or insulation without being immediately visible from inside your home.
- Why it matters: Lingering moisture encourages mold growth and weakens roof structure.
- What to do: Inspect your attic during daylight hours, if you see light around the vent pipe, water may be entering through the same space.
Addressing this early helps preserve indoor air quality and prevents rot from spreading to other roof components.

Common Causes of Roof Pipe Flashing Failure
Understanding what leads to flashing failure can help you prevent future leaks and extend your roof’s service life.
- Age and Weather Exposure: Over time, temperature extremes cause flashing materials to expand and contract, which leads to cracking or loosening. UV rays can dry out rubber boots and cause sealants to deteriorate.
- Improper Installation: Flashing must be carefully integrated with the roofing material. If it’s nailed too tightly, cut incorrectly, or installed without proper overlap, it won’t shed water effectively.
- Roof Movement: Roofs naturally shift due to structural settling and thermal expansion. This movement can break the seal between flashing and roofing materials if flexible products aren’t used.
- Debris and Clogs: Leaves, dirt, or bird nests that collect around flashing can trap moisture, accelerating wear and corrosion. Keeping these areas clean ensures proper drainage.
Repair vs. Replacement: What’s Best for Damaged Flashing?
The best solution depends on the severity of the damage. Minor cracks or gaps can often be repaired with sealant, but widespread deterioration may require full flashing replacement.
When to Repair
- Small cracks: Can be sealed with roofing-grade caulk or sealant.
- Loose collars: Re-secure with compatible fasteners and reseal.
- Minor rust spots: Sand, prime, and repaint for added protection.
When to Replace
- Severe cracking or rot: Replace the flashing entirely to prevent further damage.
- Persistent leaks: If water keeps returning after patching, full replacement is necessary.
- Aging roofs: If your roof is nearing 15–20 years old, replacement ensures compatibility and performance.
How Roof Pipe Flashing Is Installed
While many homeowners never see their roof flashing up close, understanding the process offers valuable insight into how this small feature protects your home.
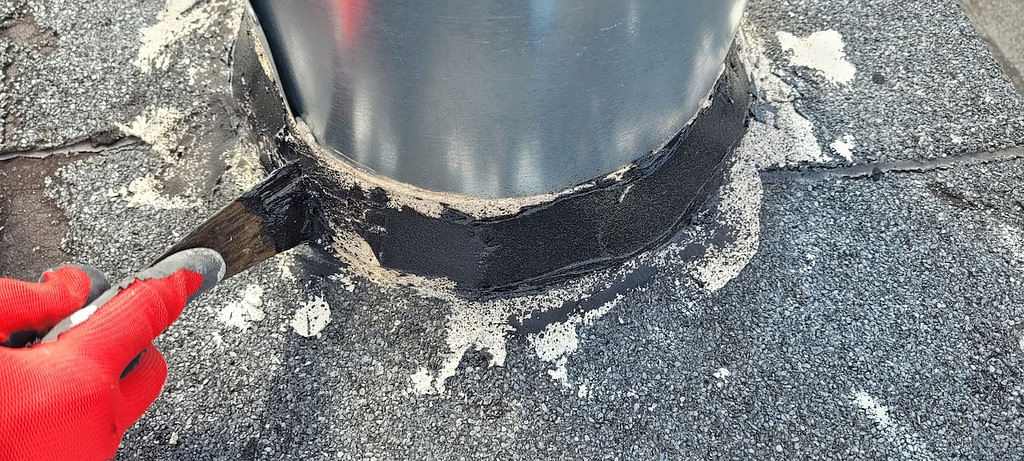
Proper installation begins with cutting the roof membrane or shingles to fit snugly around the vent pipe. The flashing flange is then placed over the opening, with the upper edge tucked beneath the surrounding roofing material. The collar or boot fits tightly around the pipe, sealing it from top to bottom.
Key Installation Tips
- Use high-quality materials: Choose flashing rated for UV and temperature resistance.
- Seal correctly: Apply compatible sealant beneath and around the flange.
- Check slope alignment: Ensure the flashing follows the roof’s pitch to direct water properly.
- Secure carefully: Avoid over-tightening nails or screws, which can warp the metal or rubber.
When done correctly, flashing should integrate seamlessly with the roof and last as long as the roofing material itself.
Preventive Maintenance for Roof Pipe Flashing
Simple maintenance steps can greatly reduce the likelihood of flashing-related leaks and extend your roof’s overall lifespan.
- Inspection Schedule: Inspect your roof flashing at least twice a year, once in the spring and again in the fall. Check after major storms to ensure no components have shifted or cracked.
- Keep Roof and Gutters Clear: Debris buildup causes standing water that accelerates wear. Regular cleaning promotes better drainage and reduces the risk of corrosion.
- Reapply Sealant as Needed: Sealant naturally wears down from heat and UV exposure. Reapplying it every few years helps maintain a watertight barrier.
- Upgrade Aging Flashing: When re-roofing, consider upgrading to premium materials like stainless steel or copper for improved longevity.

Protect Your Roof With Smart Maintenance From Young Construction
Your roof pipe flashing might be small, but it plays a big role in keeping your home safe, dry, and efficient. Regular inspections and maintenance prevent leaks and extend the life of your roofing system, saving you from expensive damage in the long run.
By keeping an eye on flashing performance and acting at the first signs of trouble, you can prevent costly repairs and protect your home year-round. Contact Young Construction today for a free estimate and learn more about safeguarding your roof through expert knowledge and maintenance practices.