Your roof is your home’s first line of defense against the elements, protecting everything inside it from rain, snow, heat, and wind. But did you know the shingles on your roof aren’t doing the job alone? Beneath those shingles lies an essential layer that often goes unnoticed but plays a critical role in roof protection—roof underlayment.
Whether you’re planning a roof replacement or simply want to better understand how your home is kept safe and dry, knowledge about roof underlayment is a key aspect of understanding your roof’s overall structure. We’ll cover all of that and more, including:
- Different types of underlayment
- How to choose the right style for your home
- The main functions of roof underlayment
What is Roof Underlayment?
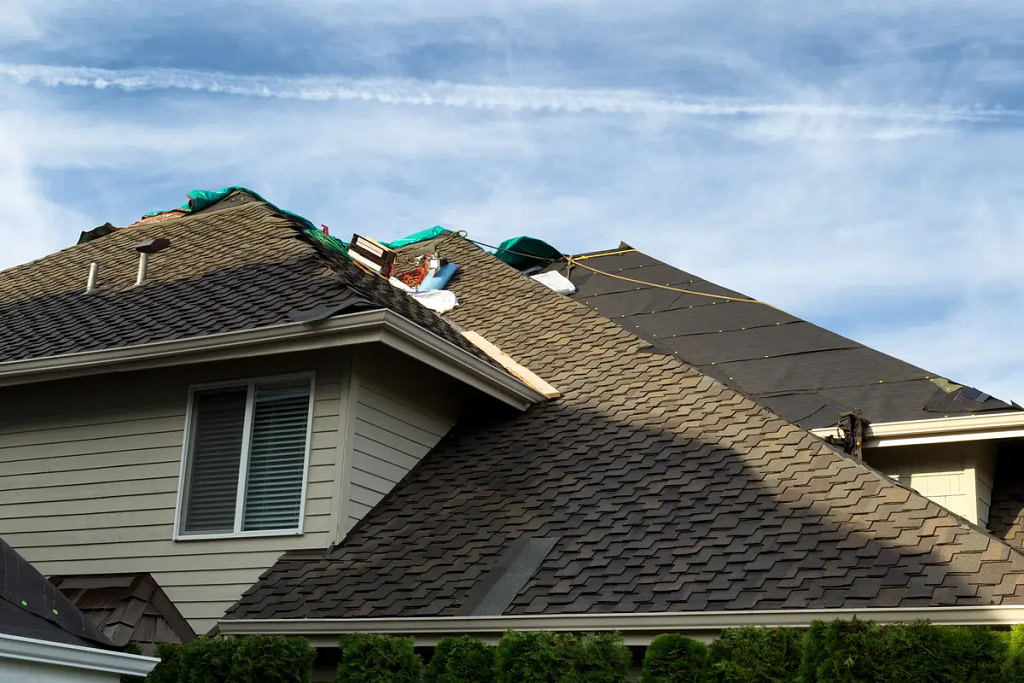
Roof underlayment is a protective barrier installed directly onto your roof deck before the shingles, tiles, or other roofing materials are applied. This layer acts as a backup to shield your home from water infiltration in case your primary roofing material fails, whether due to damaged shingles, blown-off tiles, or extreme weather.
It’s not just an “extra step” in roofing—it’s a vital part of any roofing system.
Why is Roof Underlayment Important?
Think of your roof like a system with multiple parts working together. When everything works harmoniously, you get a weatherproof, long-lasting structure. Roof underlayment provides several benefits that help maintain this harmony:
- Waterproofing: Roof underlayment is a secondary layer of defense against water. While shingles are your roof’s primary shield, they aren’t impervious to leaks, especially during extreme weather or over time as they age. The underlayment is designed to catch and redirect any water that seeps through, preventing moisture from penetrating your roof deck and causing rot or mold.
- Extra Weather Protection: If your shingles or tiles blow off during a storm, the underlayment provides temporary protection to keep your home safe until repairs are made.
- Preventing Ice Dams: Ice dams are a common homeowner headache in cold climates. Underlayment can help protect your roof deck and attic from water damage caused by melting ice backing up under shingles.
- Improved Roof Longevity: By safeguarding your roof deck from moisture and other external elements, underlayment extends the lifespan of your roofing system as a whole.
- Better Insulation: Some roof underlayments are engineered to offer better thermal insulation, reducing energy costs by helping maintain stable indoor temperatures.
Now that we understand its purpose, it’s time to explore the different types of roof underlayment available.
3 Types of Roof Underlayment
There’s no one-size-fits-all when it comes to roof underlayment. The right choice depends on your region’s climate, your home’s roofing material, and your individual budget. Here’s a breakdown of the most common types:
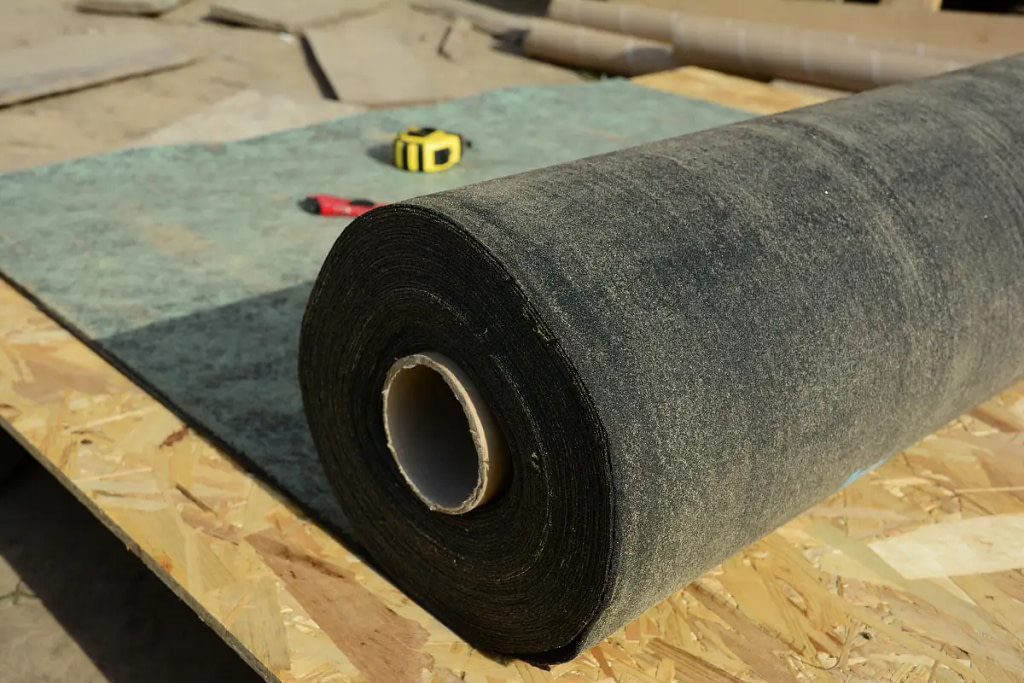
1. Felt Underlayment (Traditional)
Felt underlayment, often called “tar paper,” has been the industry standard for many years. It’s made of organic fibers, like paper or wood, saturated with asphalt. Commonly available in 15-pound and 30-pound options, the thickness of felt determines its durability.
👍 Pros:
- Affordable and widely available
- Provides basic water resistance
- Tried-and-tested option for decades
👎 Cons:
- Less durable than modern options
- Prone to tearing during installation
- Can absorb moisture, which may lead to wrinkling
Felt underlayment is still a popular choice among homeowners due to its budget-friendly price.
2. Synthetic Underlayment
Synthetic underlayment is the new kid on the block and has quickly gained popularity for its advanced features. Made from woven or spun polyethylene or polypropylene, it is designed to be lightweight, durable, and water-resistant.
👍 Pros:
- Stronger and more tear-resistant than felt
- Lightweight and easy to install
- Highly resistant to water absorption
- UV-resistant, tolerating sunlight better during installation
- Offers better thermal insulation
👎 Cons:
- Higher upfront cost compared to felt
For homeowners looking for a durable and long-lasting solution, synthetic underlayment is often the go-to option.
3. Rubberized Asphalt Underlayment
This is a premium roofing underlayment option with self-adhering properties. It features a rubbery, sticky asphalt covering that creates a waterproof seal when applied to your roof deck.
👍 Pros:
- 100% waterproof, offering superior protection
- Ideal for areas with heavy rain or ice dams
- Excellent durability
👎 Cons:
- Most expensive option of the three
- Requires professional installation for optimal results
This is an excellent choice for areas prone to extreme weather conditions, such as hurricanes or snowstorms.
How to Choose the Right Roof Underlayment for Your Home
When choosing the right roof underlayment, consider the following factors:
Climate
Do you live somewhere with harsh winters, heavy rains, or intense sun? For example, if ice dams are a concern, rubberized asphalt underlayment might be a good fit. For warmer climates, synthetic underlayment is a great heat-resistant option.
Roofing Material
Some roof underlayments are better suited to specific roof types. For instance:
- Synthetic underlayment pairs well with modern metal roofs or premium materials like slate tiles.
- Asphalt shingles are compatible with both felt and synthetic underlayments.
Your Budget
While rubberized asphalt offers top-tier waterproofing, it’s not always necessary for every home. If budget is a concern, felt underlayment could be a cost-effective yet functional option.
Professional Advice
At Young Construction, our roofing experts take a personalized approach to help you choose the perfect materials for your home. Get in touch for professional advice tailored to your specific needs.
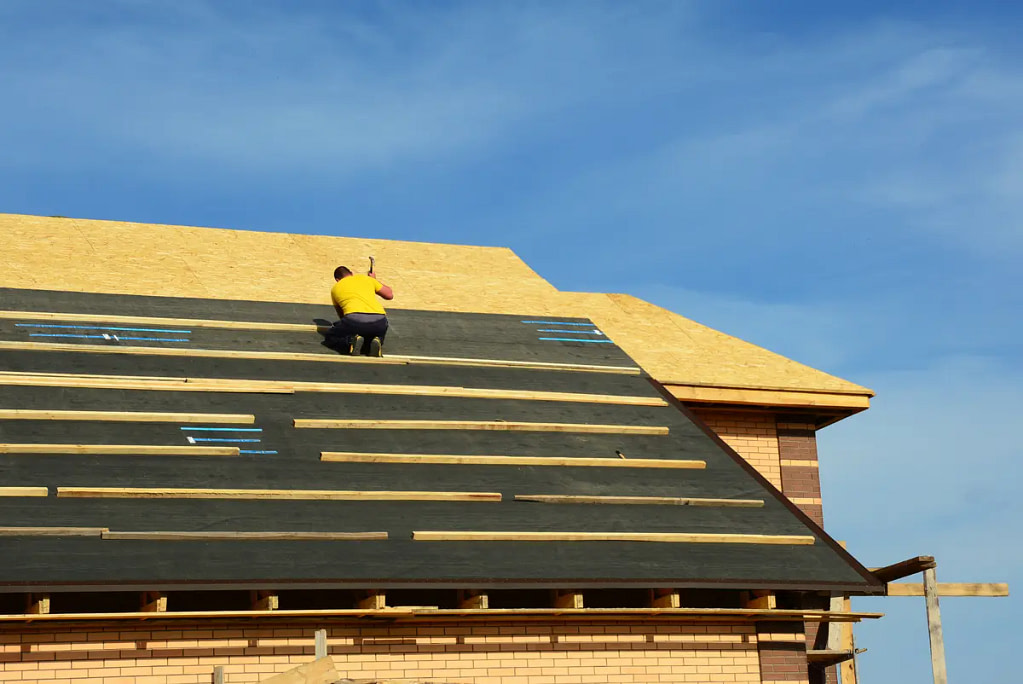
Installation Process for Roof Underlayment
The installation process of roof underlayment is the foundation upon which your roofing system is built. When done properly, it ensures your underlayment forms a reliable barrier. Here are the basic steps:
- Prepare the Roof Deck: Your roof deck must be cleaned and inspected for any damage, such as rot or mildew, before installing the underlayment.
- Measure and Align: The underlayment rolls are carefully measured and aligned with the roof’s eaves, ensuring full coverage.
- Secure the Material: Depending on the type of underlayment, it can be secured with fasteners, adhesives, or nails.
- Overlap for Coverage: Each layer overlaps slightly to create watertight seams.
- Trim and Adjust: The underlayment is trimmed along the edges and adjusted to fit roof valleys and protrusions.
While DIY-savvy homeowners might be tempted to tackle this themselves, it’s always recommended to hire roofing professionals for a safe and seamless installation.
How Much Does Roof Underlayment Cost?
The cost of roof underlayment varies depending on the type you choose. Here’s an estimate:
- Felt Underlayment: $0.15–$0.40 per square foot
- Synthetic Underlayment: $0.60–$1.00 per square foot
- Rubberized Asphalt Underlayment: $1.50–$3.00 per square foot
Keep in mind that labor costs can vary if you’re hiring professional roofers.
Trust Young Construction for Your Roofing Needs
Investing in high-quality roof underlayment is an essential step toward a strong and durable roof that protects your greatest asset—your home. At Young Construction, we pride ourselves on using trusted materials and proven techniques to ensure every roof we install stands the test of time.
Our experienced professionals prioritize your satisfaction, whether you need advice, repairs, or a complete roof replacement.If you’d like to learn more about roof underlayment or get a free quote for your next project, contact Young Construction today! Your home is in safe hands with us.