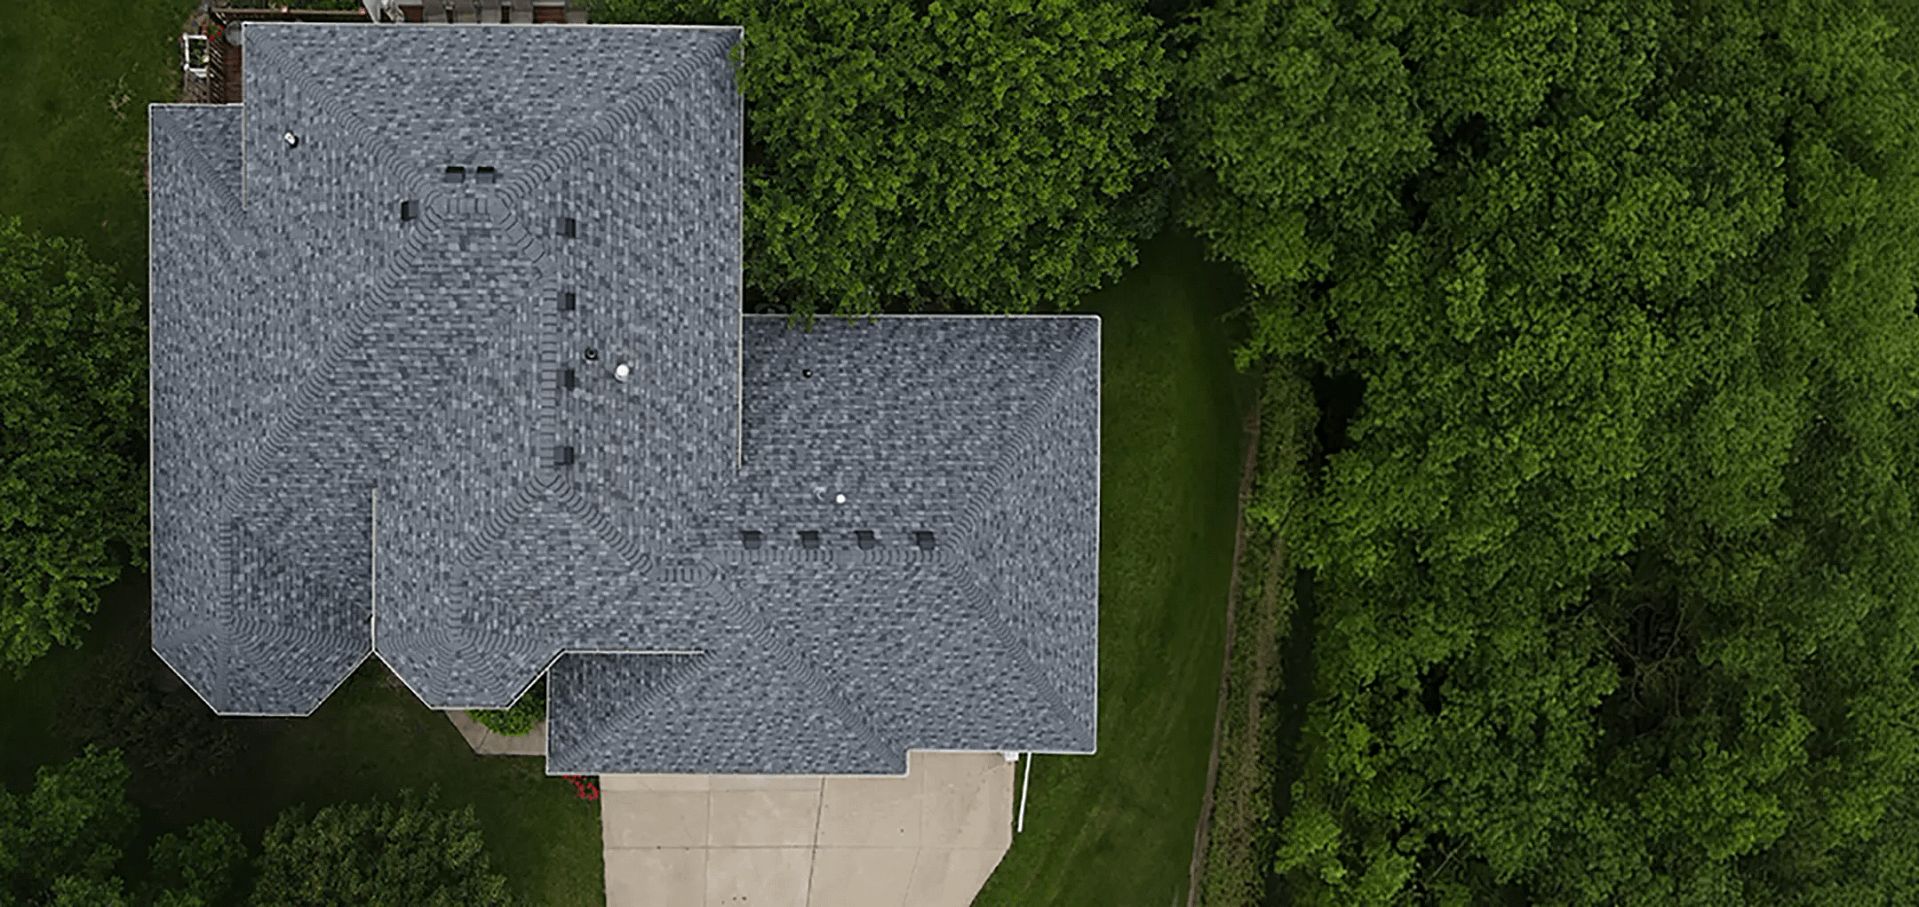
Vinyl soffit installation is the process of enclosing the underside of your roof’s overhang with durable vinyl panels that protect the eaves, support attic ventilation, and give your home a clean, finished look. The panels slide into receiving channels mounted along the wall and fascia, lock together, and are fastened loosely enough to expand and contract with temperature swings. Understanding how the process works helps you know what to expect, evaluate a contractor’s approach, and appreciate why the details matter for a lasting result. Here is what this guide covers:
- How it works: The channels, panels, and fasteners that make up a vinyl soffit system.
- The process: The step-by-step sequence from measuring to the final fascia trim.
- Key considerations: Ventilation, expansion, and the choices that shape the outcome.
What Is Vinyl Soffit and How Does It Work?
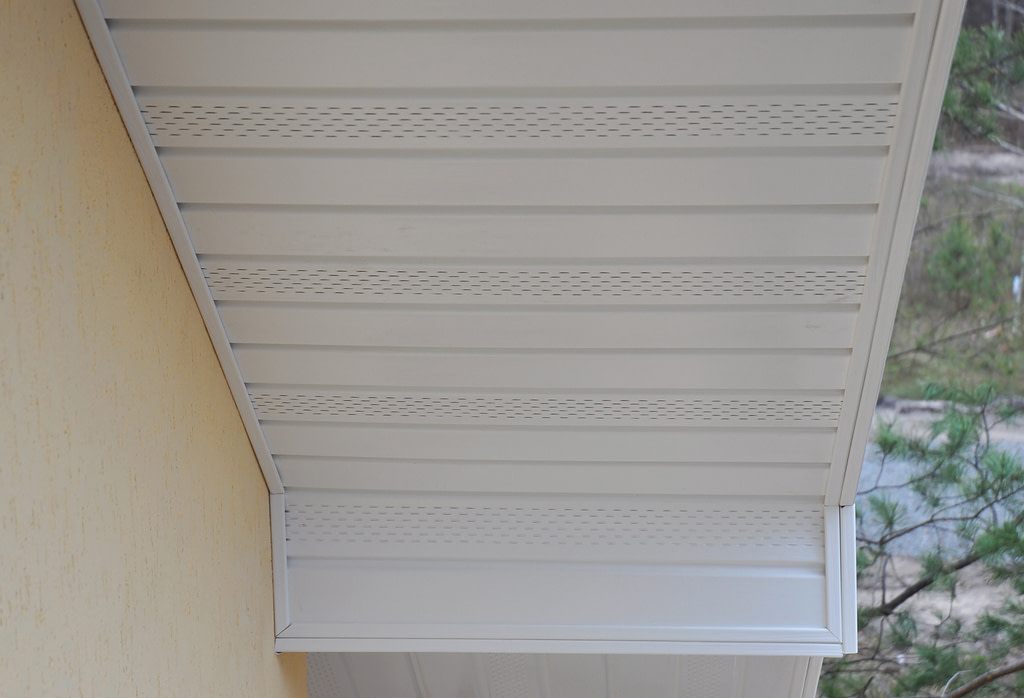
Vinyl soffit is the horizontal paneling installed underneath the eaves, running from the exterior wall out to the fascia board at the roof edge. It works as part of a system, sliding into channels that hold it in place while allowing the vinyl to move naturally, and it comes in solid or vented styles to support attic airflow.
What Are the Main Parts of a Soffit System?
The main parts of a vinyl soffit system are the panels themselves, the receiving channels that hold them, and the fasteners that secure everything while allowing movement. The panels span from wall to fascia, much like vertical siding turned horizontal, and lock together edge to edge for a seamless run. Receiving channels, either J-channel or F-channel, mount along the wall and fascia to cradle the panel ends. Fascia trim or cover then caps the vertical face of the fascia board to conceal the outer edge. Understanding these components makes the whole process easier to follow. For homes in Lake Mills and surrounding areas, a properly assembled system protects the eaves for decades.
- Soffit panels: Solid or vented vinyl that spans from the wall to the fascia.
- Receiving channels: J-channel or F-channel that hold the panel ends in place.
- Fascia trim: Vinyl cover that caps the fascia board and hides the panel edge.
- Fasteners: Nails or screws that secure panels while allowing movement.
Why Choose Vinyl Soffit?
Vinyl soffit is a popular choice because it is affordable, low-maintenance, moisture-resistant, and available in vented styles that support healthy attic airflow. Unlike wood, vinyl will not rot, and it never needs repainting, holding its color against sun and weather for years. It is lighter and easier to work with than aluminum, which makes it a cost-effective option for many homes, though aluminum can last a bit longer. Vented vinyl panels pair naturally with the rest of your ventilation system to keep the attic dry. For homeowners in Lake Mills and surrounding areas who want a clean look with minimal upkeep, vinyl delivers strong value.
- Low maintenance: Vinyl never needs repainting and resists fading.
- Moisture-proof: It will not rot or absorb water like wood soffit.
- Ventilation ready: Vented panels support balanced attic airflow.
- Cost-effective: Affordable and lightweight compared with many alternatives.
How Does the Vinyl Soffit Installation Process Work?
The vinyl soffit installation process works by first mounting receiving channels, then cutting and sliding panels into place, and finishing with fascia trim. Each step builds on a level, accurate foundation, since the channels determine whether the finished panels sit straight and true.
How Are the Panels Measured and Cut?
Panels are measured and cut to span the distance from the wall channel to the fascia, cut about a quarter inch short on each end to leave room for expansion. Installers measure the eave width carefully, since panels that are too tight will buckle as the vinyl expands in heat, and panels too loose will pull free. A circular saw with a fine-toothed blade, often installed backward to avoid chipping, or a utility knife makes clean cuts. Accurate measurement and that deliberate expansion gap are what allow the vinyl to move without warping. Precise cutting is the difference between panels that lie flat and ones that ripple.
- Measure the eave: Panel length spans wall channel to fascia board.
- Cut short for expansion: Leave about a quarter inch of movement room per end.
- Clean cuts: A fine blade or utility knife avoids chipping the vinyl.
- Flat result: Correct sizing keeps panels from buckling or pulling loose.
How Do the Channels and Panels Fit Together?
The channels and panels fit together by first fastening level receiving channels to the wall and fascia, then inserting each panel into the wall channel and flexing it to snap into the fascia channel. A chalk line struck level along the wall, at the same height as the bottom of the fascia, guides the wall channel so everything stays parallel. J-channel or F-channel is nailed roughly every 8 to 12 inches, and the panels lock edge to edge as the run continues. Keeping the two channels perfectly parallel is critical, since even a small height difference makes the panels slant. This careful alignment is the hallmark of professional work.
- Level channels first: A chalk line keeps the wall channel straight and true.
- Insert and flex: Panels slide into the wall channel, then snap into the fascia side.
- Parallel is key: Uneven channels make the finished panels visibly slant.
- Lock edge to edge: Panels interlock for a continuous, seamless run.
Correct fastening is not just about appearance, it is written into the building code. According to the Polymeric Exteriors Products Association, the 2012 and later International Residential Codes require that soffit panels be individually fastened to a supporting component such as a nailing strip, fascia, or subfascia, or as specified by the manufacturer’s instructions. Following that requirement is what keeps a soffit system secure against wind and time.
5 Key Steps in a Vinyl Soffit Installation
A vinyl soffit installation follows a clear sequence that ensures a straight, secure, and well-ventilated result. The five steps below outline how the process unfolds from preparation to the finishing trim.
1. Inspect and Prepare the Eaves
Inspecting and preparing the eaves comes first, because vinyl soffit should only go over a sound, straight, and dry surface. Installers remove old or damaged soffit, check the rafter tails and fascia for rot or sagging, and repair any problems before proceeding. Uneven rafter tails will make the finished soffit look wavy, so consistent depth matters. This is also the moment to address existing ventilation and confirm the eaves are ready to support the new system. A solid, well-prepped foundation is what makes the rest of the process succeed.
- Remove old material: Take down damaged soffit, and fascia or gutters if needed.
- Check for rot: Inspect rafter tails and fascia, repairing any decay first.
- Level the base: Uneven rafter tails create a wavy finished appearance.
- Plan ventilation: Address airflow needs before the new panels go up.
2. Establish a Level Reference Line
Establishing a level reference line ensures the entire system installs straight, since everything keys off this first mark. Installers use a chalk line snapped along the wall at the same height as the bottom of the fascia to mark exactly where the wall channel goes. A block of wood and a short level help set the correct channel location at each end of the run before the line is snapped. Getting this line truly level is essential, because any error carries through to every panel that follows. This reference is the backbone of a professional installation.
- Snap a chalk line: Mark the wall channel location level with the fascia bottom.
- Use a level: A block and short level set the correct height at each end.
- Accuracy carries through: An off-level line skews every panel installed after.
- Foundation for straightness: This line keeps the whole run parallel and true.
3. Install the Receiving Channels
Installing the receiving channels creates the tracks that hold the panels, and their alignment determines the quality of the finished look. F-channel or J-channel is fastened along the wall following the chalk line, with a matching channel on the fascia side to receive the outer panel ends. Fasteners are placed roughly every 8 to 12 inches, and at corners the channels are mitered to meet cleanly. A quarter inch of expansion space is left at adjoining walls and fascia boards so the vinyl can move. Straight, parallel, securely fastened channels are what make the panels sit flat and true.
- Wall and fascia channels: Both sides need channels to cradle the panels.
- Consistent fastening: Nail every 8 to 12 inches for a secure hold.
- Miter the corners: Clean corner cuts create neat, professional seams.
- Leave expansion room: A quarter-inch gap lets the vinyl move freely.
4. Cut and Install the Soffit Panels
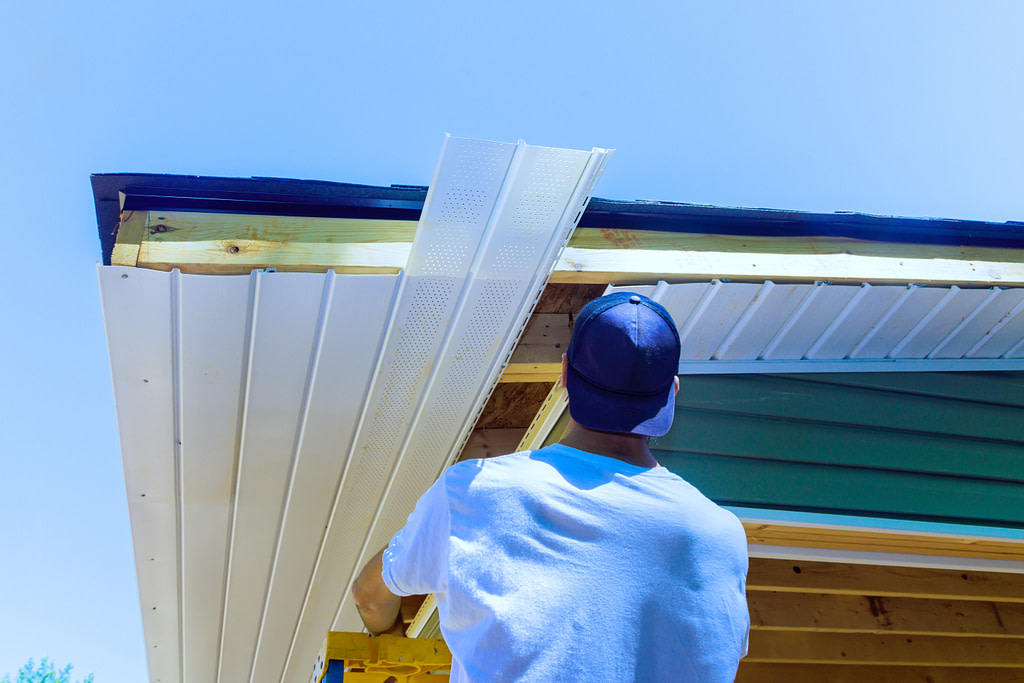
Cutting and installing the soffit panels fills in the run, sliding each precut piece into the channels and locking it to the last. Panels are inserted into the wall channel first, then flexed slightly to snap into the fascia channel, and pushed tight against the previous panel so they interlock. Fasteners driven through the nailing flange are centered in their slots and left slightly loose to allow expansion, never over-tightened. When using vented panels, installers align the vents to maximize air intake into the attic. Steady, aligned panel work is what produces a smooth, gap-free finish.
- Insert then snap: Panels go into the wall channel, then flex into the fascia side.
- Interlock tightly: Each panel locks to the last for a seamless run.
- Fasten loosely: Center nails in slots and avoid over-tightening for movement.
- Align vents: Position vented panels to maximize attic airflow.
5. Apply the Fascia Trim and Finish
Applying the fascia trim and finishing completes the system by covering the vertical face of the fascia board and concealing the panel edges. Vinyl fascia cover is installed over the fascia, often locking into a utility trim or tucking behind the existing drip edge, with fasteners left slightly loose for movement. A final inspection confirms the panels lie flat without waviness, the joints are tight but not strained, and the fascia lines run straight and parallel to the roof edge. This finishing pass is what turns a functional install into a polished one. Careful trim work is the detail that defines curb appeal.
- Cover the fascia: Vinyl trim caps the fascia and hides panel edges.
- Secure for movement: Leave fasteners slightly loose to allow expansion.
- Final inspection: Check for flat panels, tight joints, and straight lines.
- Polished finish: Clean trim work delivers lasting curb appeal.
What Should Homeowners Consider Before Installing?
Before installing vinyl soffit, homeowners should weigh ventilation needs, material choices, and whether to do it themselves or hire a pro. These decisions shape both the performance and the appearance of the finished result.
Do You Need Vented or Solid Soffit?
Whether you need vented or solid soffit depends on your attic ventilation, and most homes benefit from a mix of both. Vented panels provide the intake airflow that keeps the attic dry and cool, so they belong along the eaves where the roof meets the wall. Solid panels work well for decorative areas or porches where ventilation is not required. Building codes call for adequate attic ventilation, so if your existing soffit lacks openings, installers cut or add vented panels as needed. Matching vented and solid panels to your home’s needs ensures both airflow and a clean look. A professional serving Lake Mills and surrounding areas can confirm the right balance for your attic.
- Vented for airflow: Vented panels supply attic intake along the eaves.
- Solid for accents: Solid panels suit porches and decorative areas.
- Code compliance: Adequate attic ventilation is a code requirement.
- Right mix: Balancing both panel types serves airflow and appearance.
Frequently Asked Questions

How long does vinyl soffit installation take?
Most vinyl soffit installations take one to three days depending on the size of the home, the complexity of the rooflines, and whether old soffit and fascia must be removed first. Simple, straight eaves go quickly, while multiple corners and levels take longer. Weather and the condition of the existing eaves also affect the timeline.
How much does vinyl soffit installation cost?
Vinyl soffit installation typically ranges from about $6 to $12 per linear foot installed, though the total depends on home size, roofline complexity, and whether fascia work is included. Larger homes and intricate eaves cost more. A detailed, written estimate gives you an accurate figure for your home.
Can I install vinyl soffit over existing wood soffit?
Yes, you can sometimes install vinyl soffit over existing wood as long as the wood is sound and you maintain proper ventilation. If the old wood is rotted or the eaves are not straight, removal and repair are the better path. Ensuring adequate airflow is essential to prevent the covered wood from rotting.
How long does vinyl soffit last?
Vinyl soffit typically lasts 20 to 30 years, while aluminum can last 30 to 40 years with minimal maintenance. Lifespan depends on the quality of the material, the installation, and exposure to weather. Vinyl’s resistance to rot and fading helps it hold up well over time.
Why do vinyl soffit panels need an expansion gap?
Vinyl expands and contracts with temperature changes, so panels are cut slightly short and fastened loosely to allow that movement. Without an expansion gap, panels buckle, warp, or pull loose in the heat. This is why installers never cut panels too tight or over-tighten the fasteners.
Should I install vinyl soffit myself or hire a professional?
A handy homeowner can install vinyl soffit, but it requires safe ladder work, accurate leveling, and knowledge of expansion and ventilation requirements. Mistakes like uneven channels or blocked vents lead to slanted panels or trapped moisture. Many homeowners prefer a professional to ensure a straight, secure, and well-ventilated result.
Trust Young Construction for Your Vinyl Soffit Installation
When it comes to vinyl soffit installation done right, Young Construction brings over 20 years of local experience and a careful eye for the details that make the difference, from level channels to proper expansion gaps and balanced ventilation. We inspect and prep your eaves, install straight, secure panels, align vented sections for healthy attic airflow, and finish with clean fascia trim that boosts your home’s curb appeal. As a family-owned, fully licensed and insured company with more than 150 five-star reviews, we treat your home with genuine care and explain every step in plain terms. If your soffit is aging, sagging, or overdue for an upgrade, you deserve workmanship that looks great and lasts. Contact Young Construction today to talk through your soffit and fascia needs and request a detailed, written estimate, and let our team give the edge of your roof a clean, durable finish.