A water leak in your ceiling is never a good sign. Whether it’s a minor drip or a full-blown waterfall, it needs immediate attention. But what causes water to leak from a ceiling, and how do you fix it? This blog post will help explain what you need to know, including:
- Common causes of water leaking from ceilings
- How to locate the source of the leak
- Key steps to fix the problem
- Tips to prevent future ceiling leaks
- When to call in professional help
What Causes Water to Leak From a Ceiling?
A ceiling water leak can stem from various issues, some of which may be hidden. Here are the most common causes:
Plumbing Issues: Leaking pipes or faulty plumbing fixtures often lead to water accumulating in the ceiling. This is common in bathrooms located above the leak.
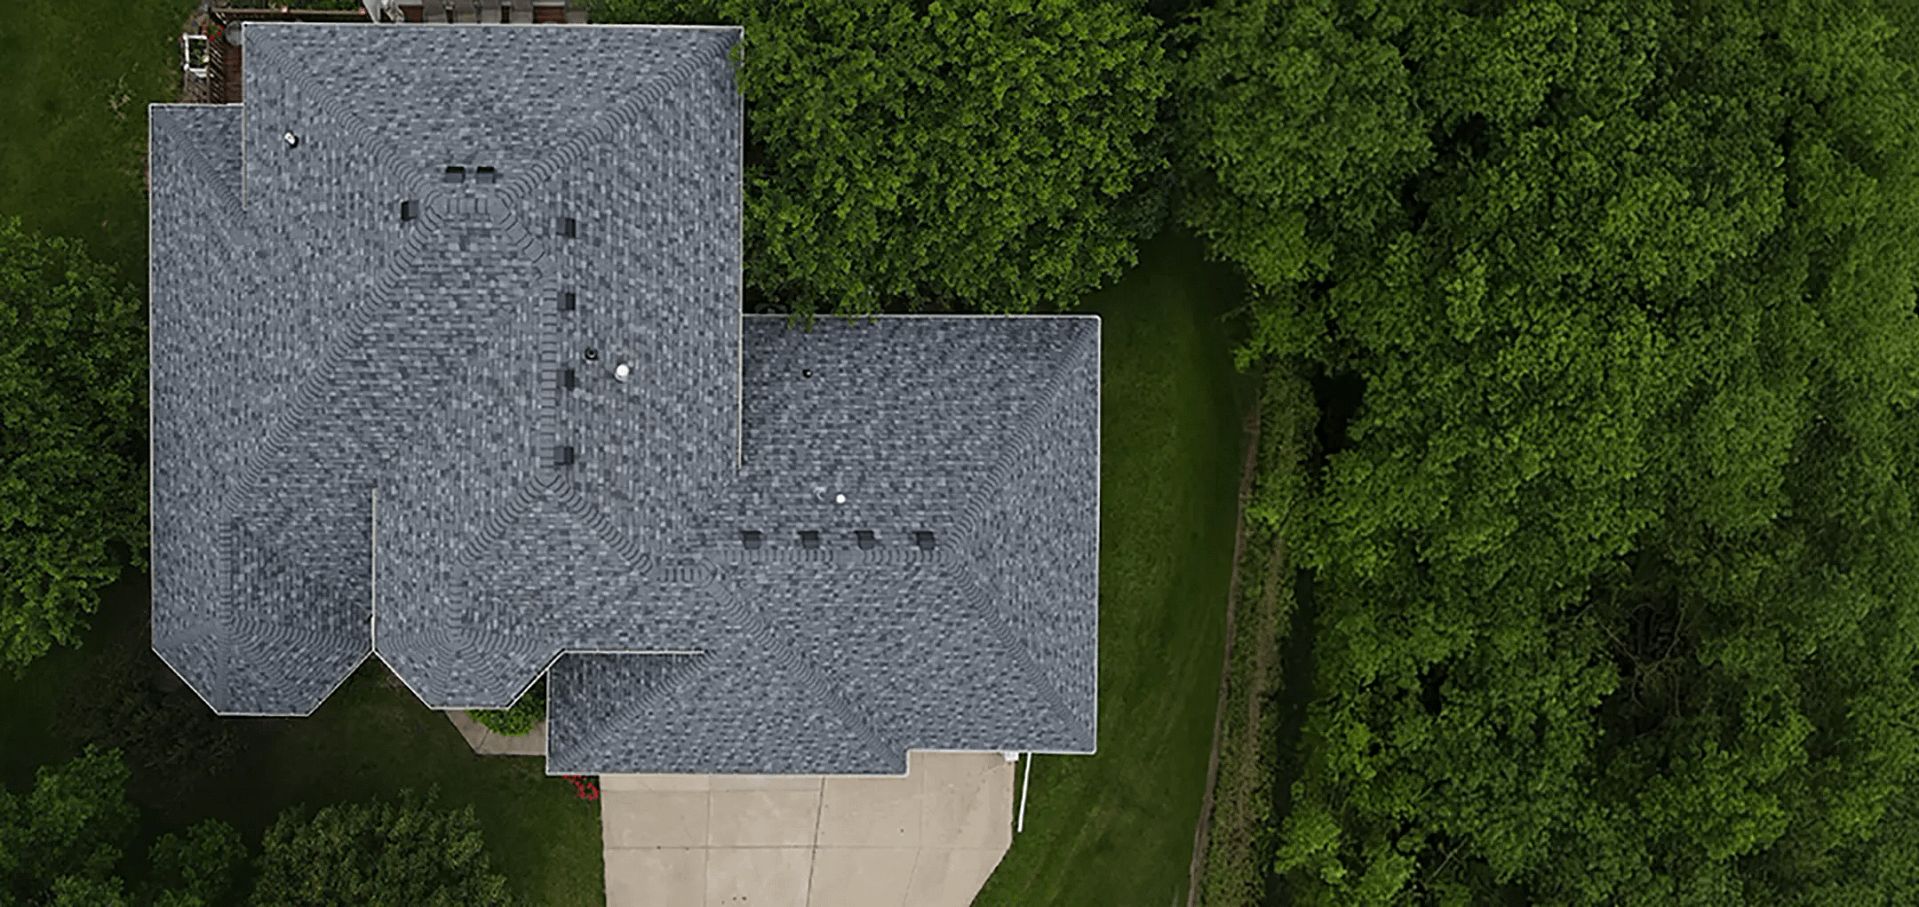
Roofing Problems: If the leak appears after rain, your roof might be the culprit. Potential roofing issues include:
- Missing or damaged shingles
- Cracked or clogged gutters
- Faulty flashing around chimneys or vents
HVAC System Condensation: Air conditioning units or duct systems can sometimes produce excess condensation. If improper drainage occurs, that water can seep through your ceiling.
Poor Waterproofing: Cracks or compromised seals in walls or windows nearby can also cause water to leak into your home, particularly during heavy rain or storms.
How to Locate the Source of the Leak
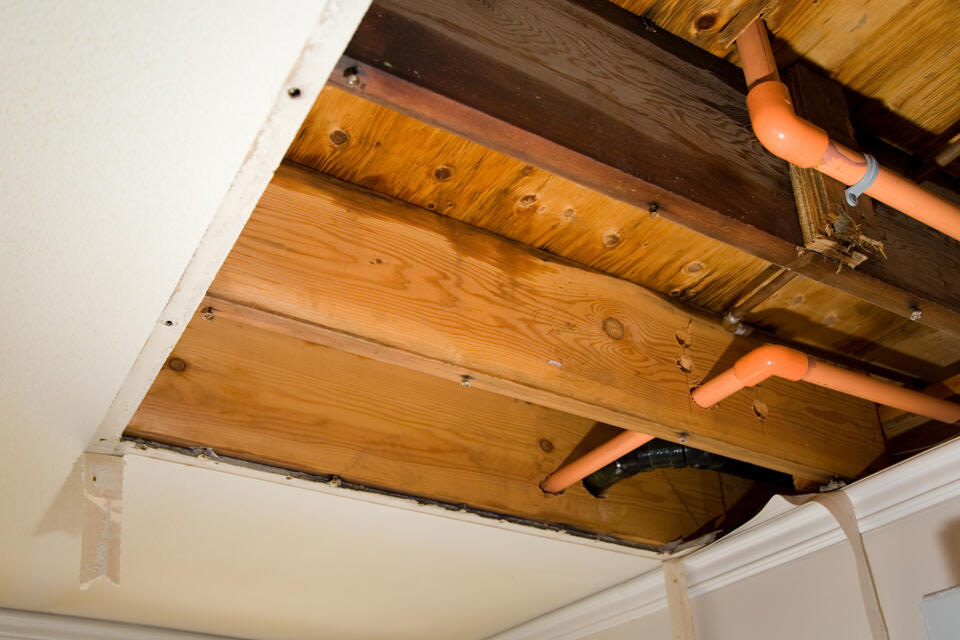
Finding the exact source of a ceiling leak can be challenging because water often travels along beams or pipes before it drips through the ceiling. Identifying the origin quickly helps prevent structural damage, mold growth, and costly repairs.
Follow these steps to track down the source of the leak.
Inspect the Area Above the Leak
Start by checking the room directly above the damaged ceiling.
Look for plumbing fixtures such as:
- Sinks
- Toilets
- Bathtubs or showers
- Dishwashers
- Washing machines
Even a small pipe drip or loose fitting can slowly soak insulation and drywall before appearing as a ceiling leak.
1. Inspect the Area Directly Above the Leak
If the leak isn’t linked to indoor plumbing, it could be coming from your roof. Head outside and carefully look for visible signs of roof damage, such as missing or cracked shingles, flashing that has come loose, or debris buildup. Clogged gutters or downspouts can also cause water to pool and seep into vulnerable areas. If possible, inspect your attic for signs of water intrusion, such as wet insulation, mold, or daylight shining through cracks.
Signs of a plumbing leak
- Water stains on the floor
- Damp carpet or flooring
- Mold or mildew smell
- Visible dripping under sinks
- Warped flooring
If the leak sits directly below a bathroom or kitchen, plumbing is often the cause.
2. Check the Attic for Water Intrusion
If the leak isn’t connected to plumbing, the next place to inspect is the attic.
Bring a flashlight and look for:
- Wet insulation
- Dark water stains on rafters
- Mold growth
- Damp wood
- Daylight coming through the roof
Water entering through the roof will often run along rafters before dripping down, so the leak location in the ceiling may not be directly under the roof damage.
3. Look for Roof Damage Outside
Next, inspect the roof from the ground or with binoculars.
Common roof leak causes include:
- Missing shingles
- Cracked shingles
- Damaged roof flashing
- Worn roof vents
- Debris buildup in roof valleys
Also check your gutters and downspouts. Clogged gutters can cause water to back up under shingles and leak into the attic.
Never climb on a wet or steep roof unless you have proper safety equipment.
4. Inspect HVAC Systems and Air Ducts
If the leak is near an air vent or HVAC system, condensation could be the problem.
Air conditioners create moisture that drains through a condensate line. If this line becomes clogged, water may overflow.
Check for:
- A clogged condensate drain line
- A full or cracked drip pan
- Water around the air handler
- Condensation on ducts
HVAC leaks are especially common during hot and humid summer months.
5. Pay Attention to Weather Patterns
Tracking when the leak appears can help narrow down the cause.
| When the Leak Happens | Likely Cause |
|---|---|
| Only during rain | Roof damage |
| Constant dripping | Plumbing leak |
| During AC use | HVAC condensation |
| After snow melts | Ice dam or roof issue |
In colder climates like Iowa, ice dams are a common cause of winter ceiling leaks. Melted snow can refreeze at roof edges, forcing water under shingles.
6. Call a Professional if You Can’t Find the Source
Some leaks originate in hidden areas inside walls or ceilings, making them difficult to locate without specialized tools.
A professional roofer or plumber may use:
- Moisture meters
- Infrared cameras
- Pressure tests
- Roof inspections
If the leak continues or the ceiling begins to sag or bubble, contact a professional immediately to avoid structural damage.
7 Signs Your Ceiling Leak Is Serious
A ceiling leak may seem minor at first, but certain warning signs can indicate serious structural damage or ongoing water intrusion. Watch for these signs that your ceiling leak may require immediate attention:
Common signs a ceiling leak is serious include:
- A sagging or bulging ceiling
- Large brown or yellow water stains
- Peeling paint or bubbling drywall
- A persistent musty or moldy smell
- Water dripping near electrical fixtures
- Leaks that worsen during rain
- Cracks forming in the ceiling
If you notice any of these symptoms, it’s important to identify the source of the leak quickly to prevent further damage.
1. Sagging or Bulging Ceiling
A sagging or swollen ceiling usually means water has collected above the drywall. As moisture builds up, the weight can weaken the ceiling and potentially cause it to collapse. If you notice a bulge forming, it’s important to relieve the pressure and address the source of the leak as soon as possible.
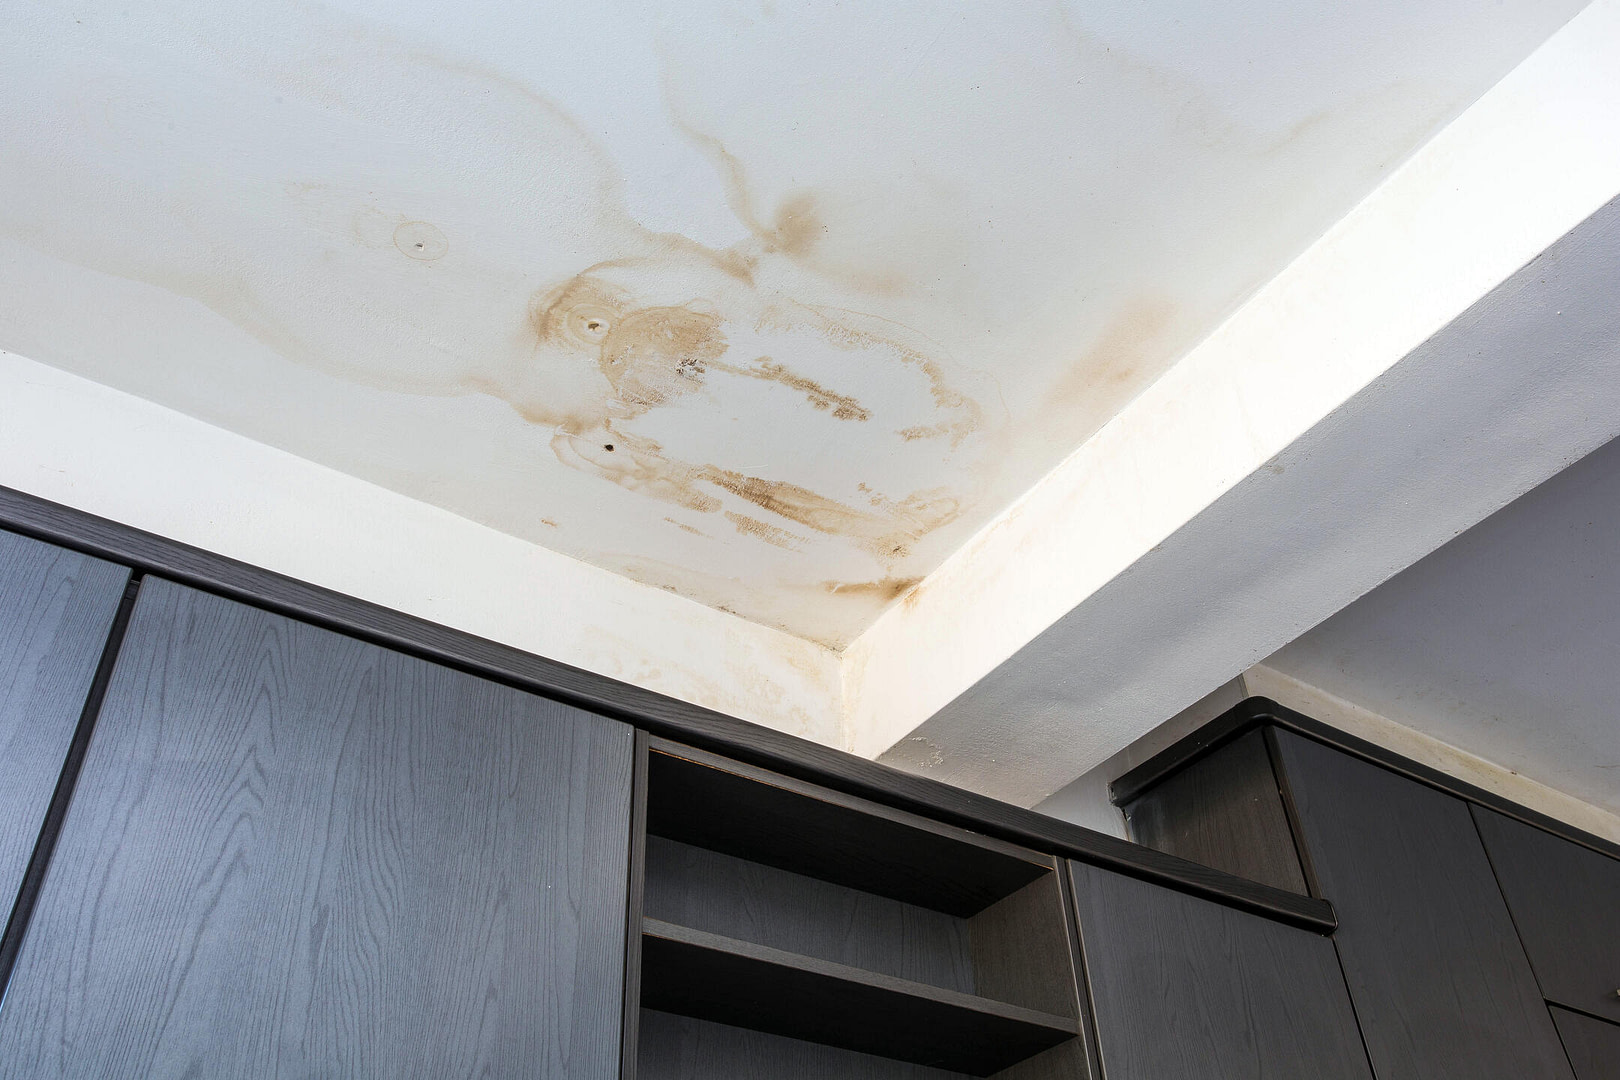
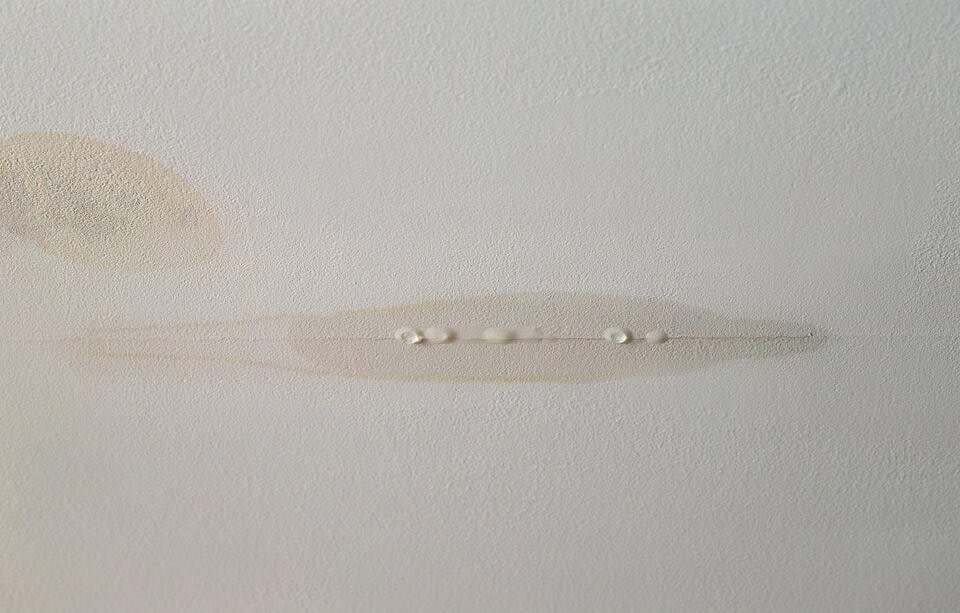
2. Large Brown or Yellow Water Stains
Water stains that continue to grow or darken over time often indicate an ongoing leak. These stains usually appear yellow, brown, or rust-colored and can spread across the ceiling as moisture continues to seep into the drywall.
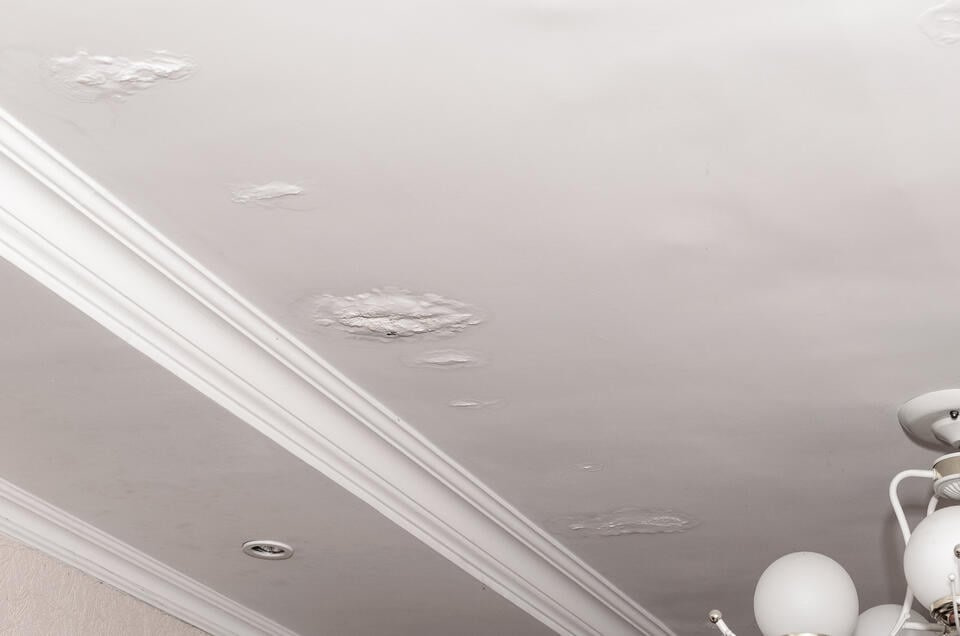
3. Peeling Paint or Bubbling Drywall
When moisture gets trapped behind paint or drywall, it can cause the surface to bubble, crack, or peel. This is a strong indicator that water has been present for a while and may already be damaging the structure behind the ceiling.
4. Persistent Musty or Moldy Smell
A damp, musty odor in your home may signal hidden mold growth inside the ceiling or attic. Mold thrives in moist environments and can begin developing within 24 to 48 hours after water exposure, making it important to address leaks quickly.
5. Water Dripping Near Electrical Fixtures
Leaks near light fixtures, ceiling fans, or electrical wiring are especially dangerous. Water and electricity are a hazardous combination and can increase the risk of electrical damage or fire. If you notice this, turn off power to the affected area and investigate immediately.
6. The Leak Gets Worse During Rain
If your ceiling only leaks during heavy rain or storms, the issue is likely related to your roof. Damaged shingles, deteriorated flashing, or clogged gutters can allow rainwater to enter your attic and eventually leak into the ceiling below.
7. Cracks Forming in the Ceiling
Cracks in the ceiling around the leak can signal that the drywall or plaster is weakening due to water damage. Over time, continued exposure to moisture can compromise the structural integrity of the ceiling.
5 Steps to Fix a Water Leak in Your Ceiling
Once you’ve identified the source of the leak, taking the right steps quickly can help minimize damage and prevent the problem from getting worse.
The basic steps to fix a ceiling leak include:
- Stop the water flow
- Protect the surrounding area
- Drain any trapped water
- Fix the source of the leak
- Repair the damaged ceiling
Follow these steps to address the issue safely and effectively.
1. Stop the Water Flow
The first and most important step is stopping the water from continuing to enter your home.
If the leak is plumbing-related, locate your main water shut-off valve and turn it off immediately. This will stop water from flowing through your pipes and prevent additional damage.
If the leak is coming from the roof, try to limit water intrusion by placing a tarp over the damaged area or temporarily sealing exposed sections if it’s safe to do so.
Stopping the water as quickly as possible helps limit the amount of damage inside your ceiling.
2. Protect Your Space
Water can quickly damage flooring, furniture, and electronics if it’s not contained.
Start by moving valuables away from the leaking area. Then place buckets, bowls, or containers under the drip to catch falling water. Towels or tarps can also help protect floors and absorb moisture.
Taking a few minutes to protect the area can significantly reduce cleanup and repair costs later.
3. Drain Any Trapped Water
If you notice a bulging or sagging ceiling, water may be trapped inside the drywall.
To prevent the ceiling from collapsing, carefully puncture a small hole in the lowest part of the bulge using a screwdriver or similar tool. Place a bucket underneath to catch the draining water.
Allowing the water to drain reduces pressure inside the ceiling and helps prevent the damage from spreading further.
Always stand clear while draining the ceiling in case the material is weakened.
4. Fix the Source of the Leak
Once the immediate water issue is under control, it’s time to address the root cause:
- If the leak is plumbing-related: Inspect the pipes, fittings, or connections for damage. Replace any broken or corroded parts and ensure everything is sealed tightly. You may need to call a plumber if the issue is beyond a simple fix.
- If the leak is roof-related: Check for missing shingles, damaged flashing, or clogged gutters. Temporary fixes like sealing roof gaps or clearing gutters can help, but significant damage may require professional assistance. Companies like Young Construction specialize in handling extensive roof repairs, saving you from potential future leaks. Addressing the source of the leak is critical to prevent the problem from recurring.
5. Repair the Ceiling
After the leak has been fully resolved, you can begin repairing the ceiling itself.
Start by removing any wet, warped, or sagging drywall, since damaged materials can lead to mold growth if left in place. Allow the area to dry completely before installing new drywall or patching the affected section.
Once repairs are complete, apply a moisture-resistant primer and paint to restore the ceiling’s appearance and provide additional protection.
If the damage is extensive or affects structural components, it may be best to hire a professional contractor to ensure the repair is done properly.
Tips to Prevent Future Ceiling Water Leaks
Avoid the stress of water damage by taking these proactive steps to protect your home:
- Schedule Regular Roof Inspections: Hire a professional to inspect your roof at least once a year. They can identify and repair minor issues like loose shingles, cracks, or damaged flashing before they escalate into costly leaks.
- Maintain Gutters and Downspouts: Ensure gutters are clean and free of debris to allow rainwater to flow away from your home. Clogged or overflowing gutters can lead to water pooling on your roof, increasing the risk of leaks.
- Check Plumbing Systems: Regularly inspect pipes, joints, and fixtures, especially in areas like kitchens, bathrooms, or laundry rooms. Catching small leaks early can prevent water from infiltrating your ceilings.
- Improve Home Ventilation: Proper ventilation reduces moisture buildup that can lead to condensation and water damage. Ensure your HVAC drainage systems are functioning properly, and add attic vents if needed to improve airflow.
- Seal and Waterproof Vulnerable Areas: Apply caulking and waterproofing materials around windows, walls, and doors exposed to heavy rain. Sealing these areas effectively prevents water from seeping inside during storms.
Preventative maintenance is key to avoiding the hassle and expense of ceiling water leaks. Take these steps today to safeguard your home!
When to Call the Professionals
Some water leaks are easy to fix, but others can spiral into bigger problems if not handled correctly. Knowing when to bring in experts can save time, money, and prevent further damage. Call the pros if the source of the leak is hidden or hard to find, requiring advanced tools or expertise. Additionally, signs of structural damage, such as warped ceilings, peeling paint, or mold growth, can pose health risks and weaken your home, making professional help essential. If the leak continues despite your repair attempts, it could suggest a deeper issue that needs expert attention. At Young Construction, we specialize in pinpointing and repairing water-related roof damage. Whether it’s a minor fix or a full roof replacement, we’ll make sure your home stays protected and secure for the long term.
Protect Your Home from Costly Water Damage with Expert Roof Repair
Water leaks from your ceiling can lead to costly damage if not addressed promptly and professionally. At Young Construction, our experienced team is dedicated to providing top-quality roofing solutions you can rely on. We use cutting-edge techniques and high-grade materials to ensure lasting results, helping to protect your home from further damage. With a commitment to excellent customer service and a proven track record, we’re the experts you can trust to restore your roof and your peace of mind. Contact us today for a free inspection and take the first step toward safeguarding your home.
FAQ’s
What should I do first if water starts leaking from my ceiling?
If water is actively leaking from your ceiling, start by placing a bucket or container under the drip to prevent damage to your floors. Move any furniture or valuables away from the area and, if the leak is near electrical fixtures, turn off power to that part of your home at the breaker panel. Once the immediate area is protected, try to identify the source of the leak and stop the water flow if possible.
Is a leaking ceiling considered an emergency?
A ceiling leak can quickly become an emergency if it leads to structural damage, electrical hazards, or mold growth. If the ceiling is sagging, water is dripping near electrical wiring, or the leak worsens during storms, it’s important to address the issue immediately to prevent further damage.
Why does my ceiling leak only when it rains?
If your ceiling only leaks during rainstorms, the problem is likely related to your roof. Missing shingles, damaged flashing, clogged gutters, or worn roof vents can allow rainwater to enter your attic and eventually leak into the ceiling below.
Can a small ceiling leak fix itself?
No. Even a small ceiling leak usually indicates an underlying issue such as a roof problem, plumbing leak, or condensation buildup. Ignoring the leak can allow water damage to worsen over time, leading to mold growth and more expensive repairs.